ECOVISION
Platform: Meta Quest 3
Duration: 14 weeks
Tools: Unity, Substance, RenderDoc
Role: Producor, Technical Artist
Teammates: Xun Zhang (Producer, Technical Artist)
Ayaka Morito(Producer, Game Designer)
Yuxuan (Sally) Jin (Artist, Game Designer)
Zihan (Aurora) Liu (Artist, Game Designer)
Chu (Annie) Li (Gameplay Programmer)
Yuxuan (Vector) Liu (Level Designer)
Weekly development blog: EcoVision
EcoVision is a student-developed VR project that shows how small actions can help the environment. In the game, players explore nature, interact with ecosystems, and see how their everyday choices can affect the world around them.
Many people feel that environmental problems are too big to solve alone. EcoVision challenges this idea by letting players experience the power of individual actions through hands-on, immersive gameplay.
Stylized Grass Rendering:

Pre-Blade Grass Rendering:
The main rendering method for grass uses Unity’s DrawProceduralIndirect function, an API Unity provides for instancing that treats each blade of grass as an individual instance for rendering. To generate the final render of the grass, both the vertex data and the instance data required for each blade must be provided.
To obtain the instance data, a compute shader is used to calculate the instance data buffer.
High Level Pipeline:
Source vertices provide spawn points (positions, surface normals).
Compute pass
For each source vertex:
Spawn
Nblades with random placement around the vertex.For each blade, generate a number of segments, assemble a triangle strip, and append triangles to a triangle buffer.
Draw pass
A grass shader reads the appended triangle buffer and renders with Graphics.DrawProceduralIndirect.
Compute Pass:
From a source vertex, we generate multiple random positions for blades to form a grass cluster. For each blade, we also assign a yaw rotation so it has a facing direction around the surface normal.
Each blade gets its own shape:
Height and width are randomized within min/max ranges.
Bend increases with height, and the way that bend accumulates from base to tip is shaped using a curvature control.
We also scale the very bottom slightly using a bottom width modifier to give the grass blade a more natural look.
Now we actually build the blade:
We march from the base to the tip in segments. For each segment:
t = 0…1 measures progress up the blade.
Height grows linearly with t.
Width tapers as we go up (wide at the base, narrow near the tip).
Bend accumulates using the curvature control (so the blade leans forward progressively).
We place two vertices: one to the left and one to the right of the center (current width/2).
After the last segment we add a single tip vertex in the middle, so the blade ends in a point.

With the vertex list in hand:
Slide a 3-vertex window across the list to form triangles.
Append those triangles into a triangle buffer that all blades share.
Draw Pass:
Base Color:
To ensure performance, we use a simple color gradient along the Y-axis. While more complex methods—like dithering transparency at the root or sampling a render texture of the terrain—are possible, we choose the gradient approach for its efficiency.

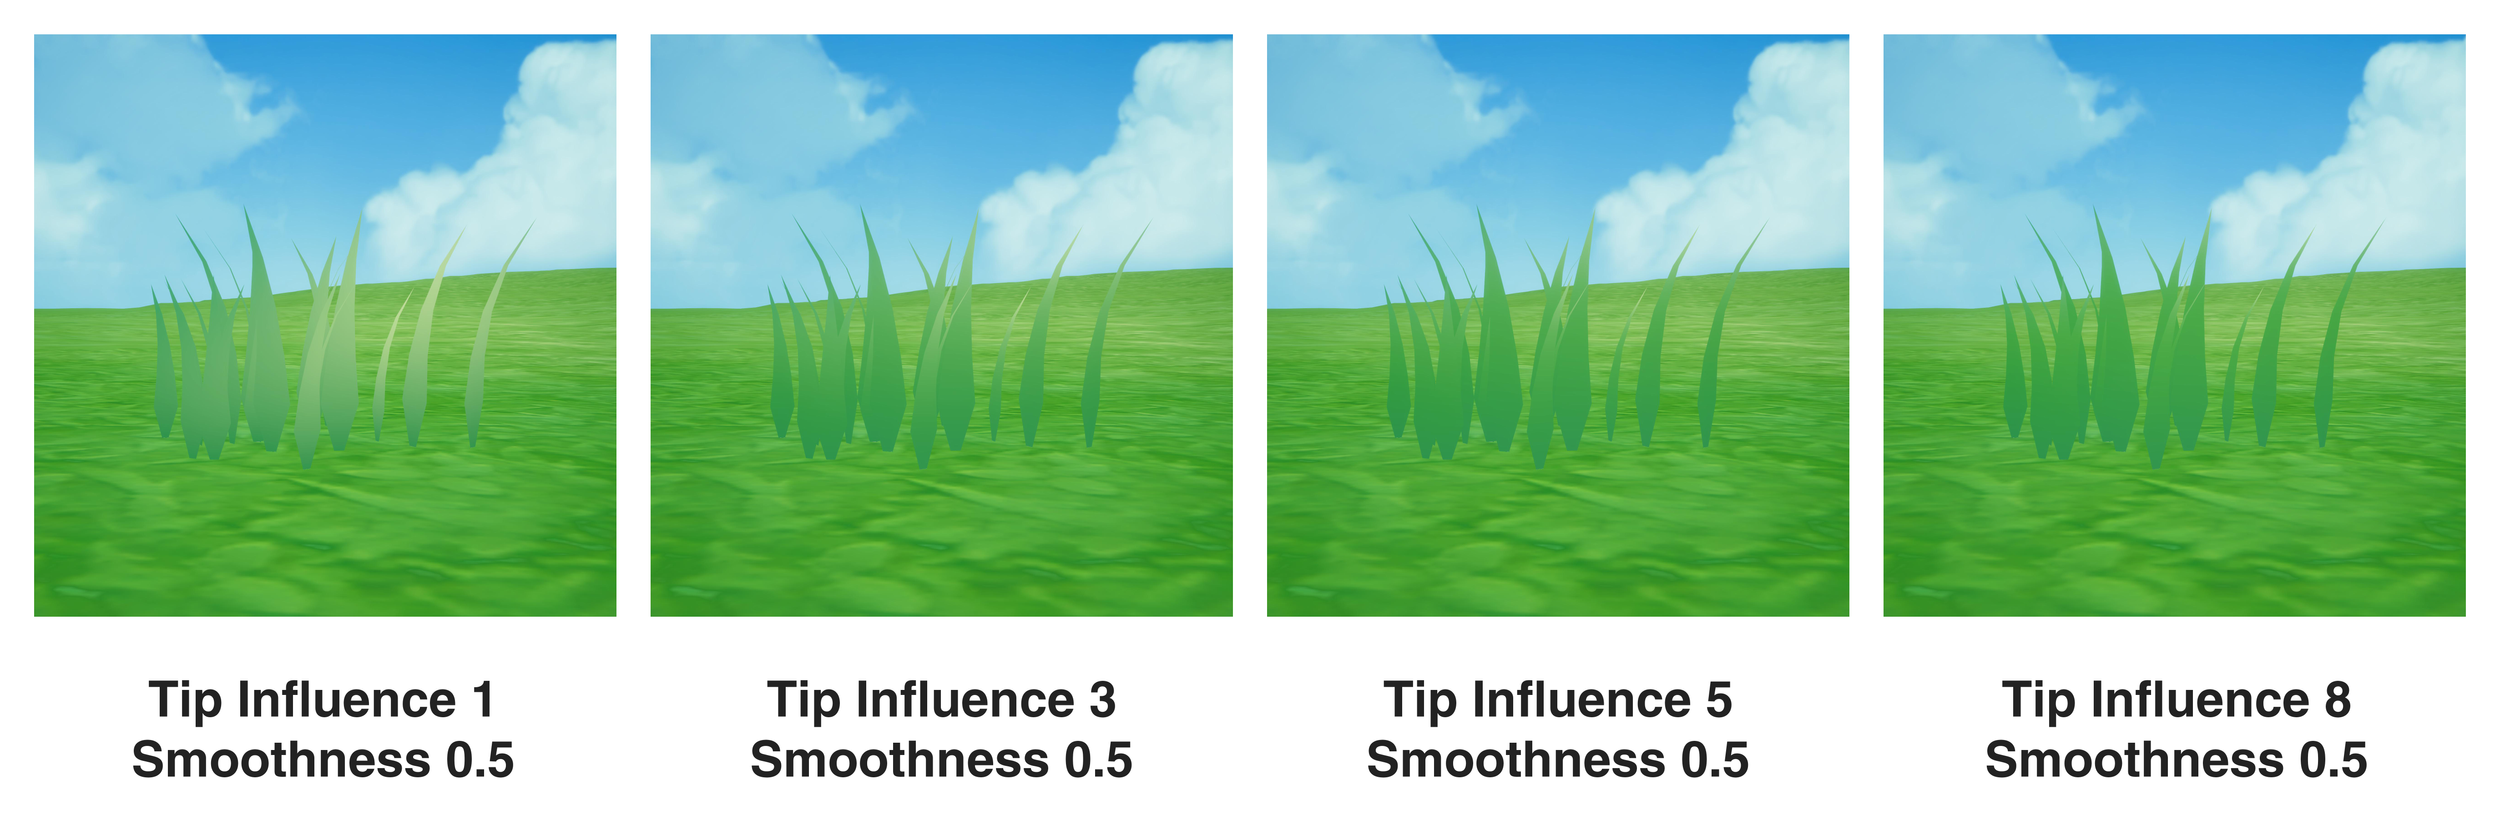
Specular:
We introduce a tip influence modifier that biases smoothness toward the tip to simulate grass specular highlights.
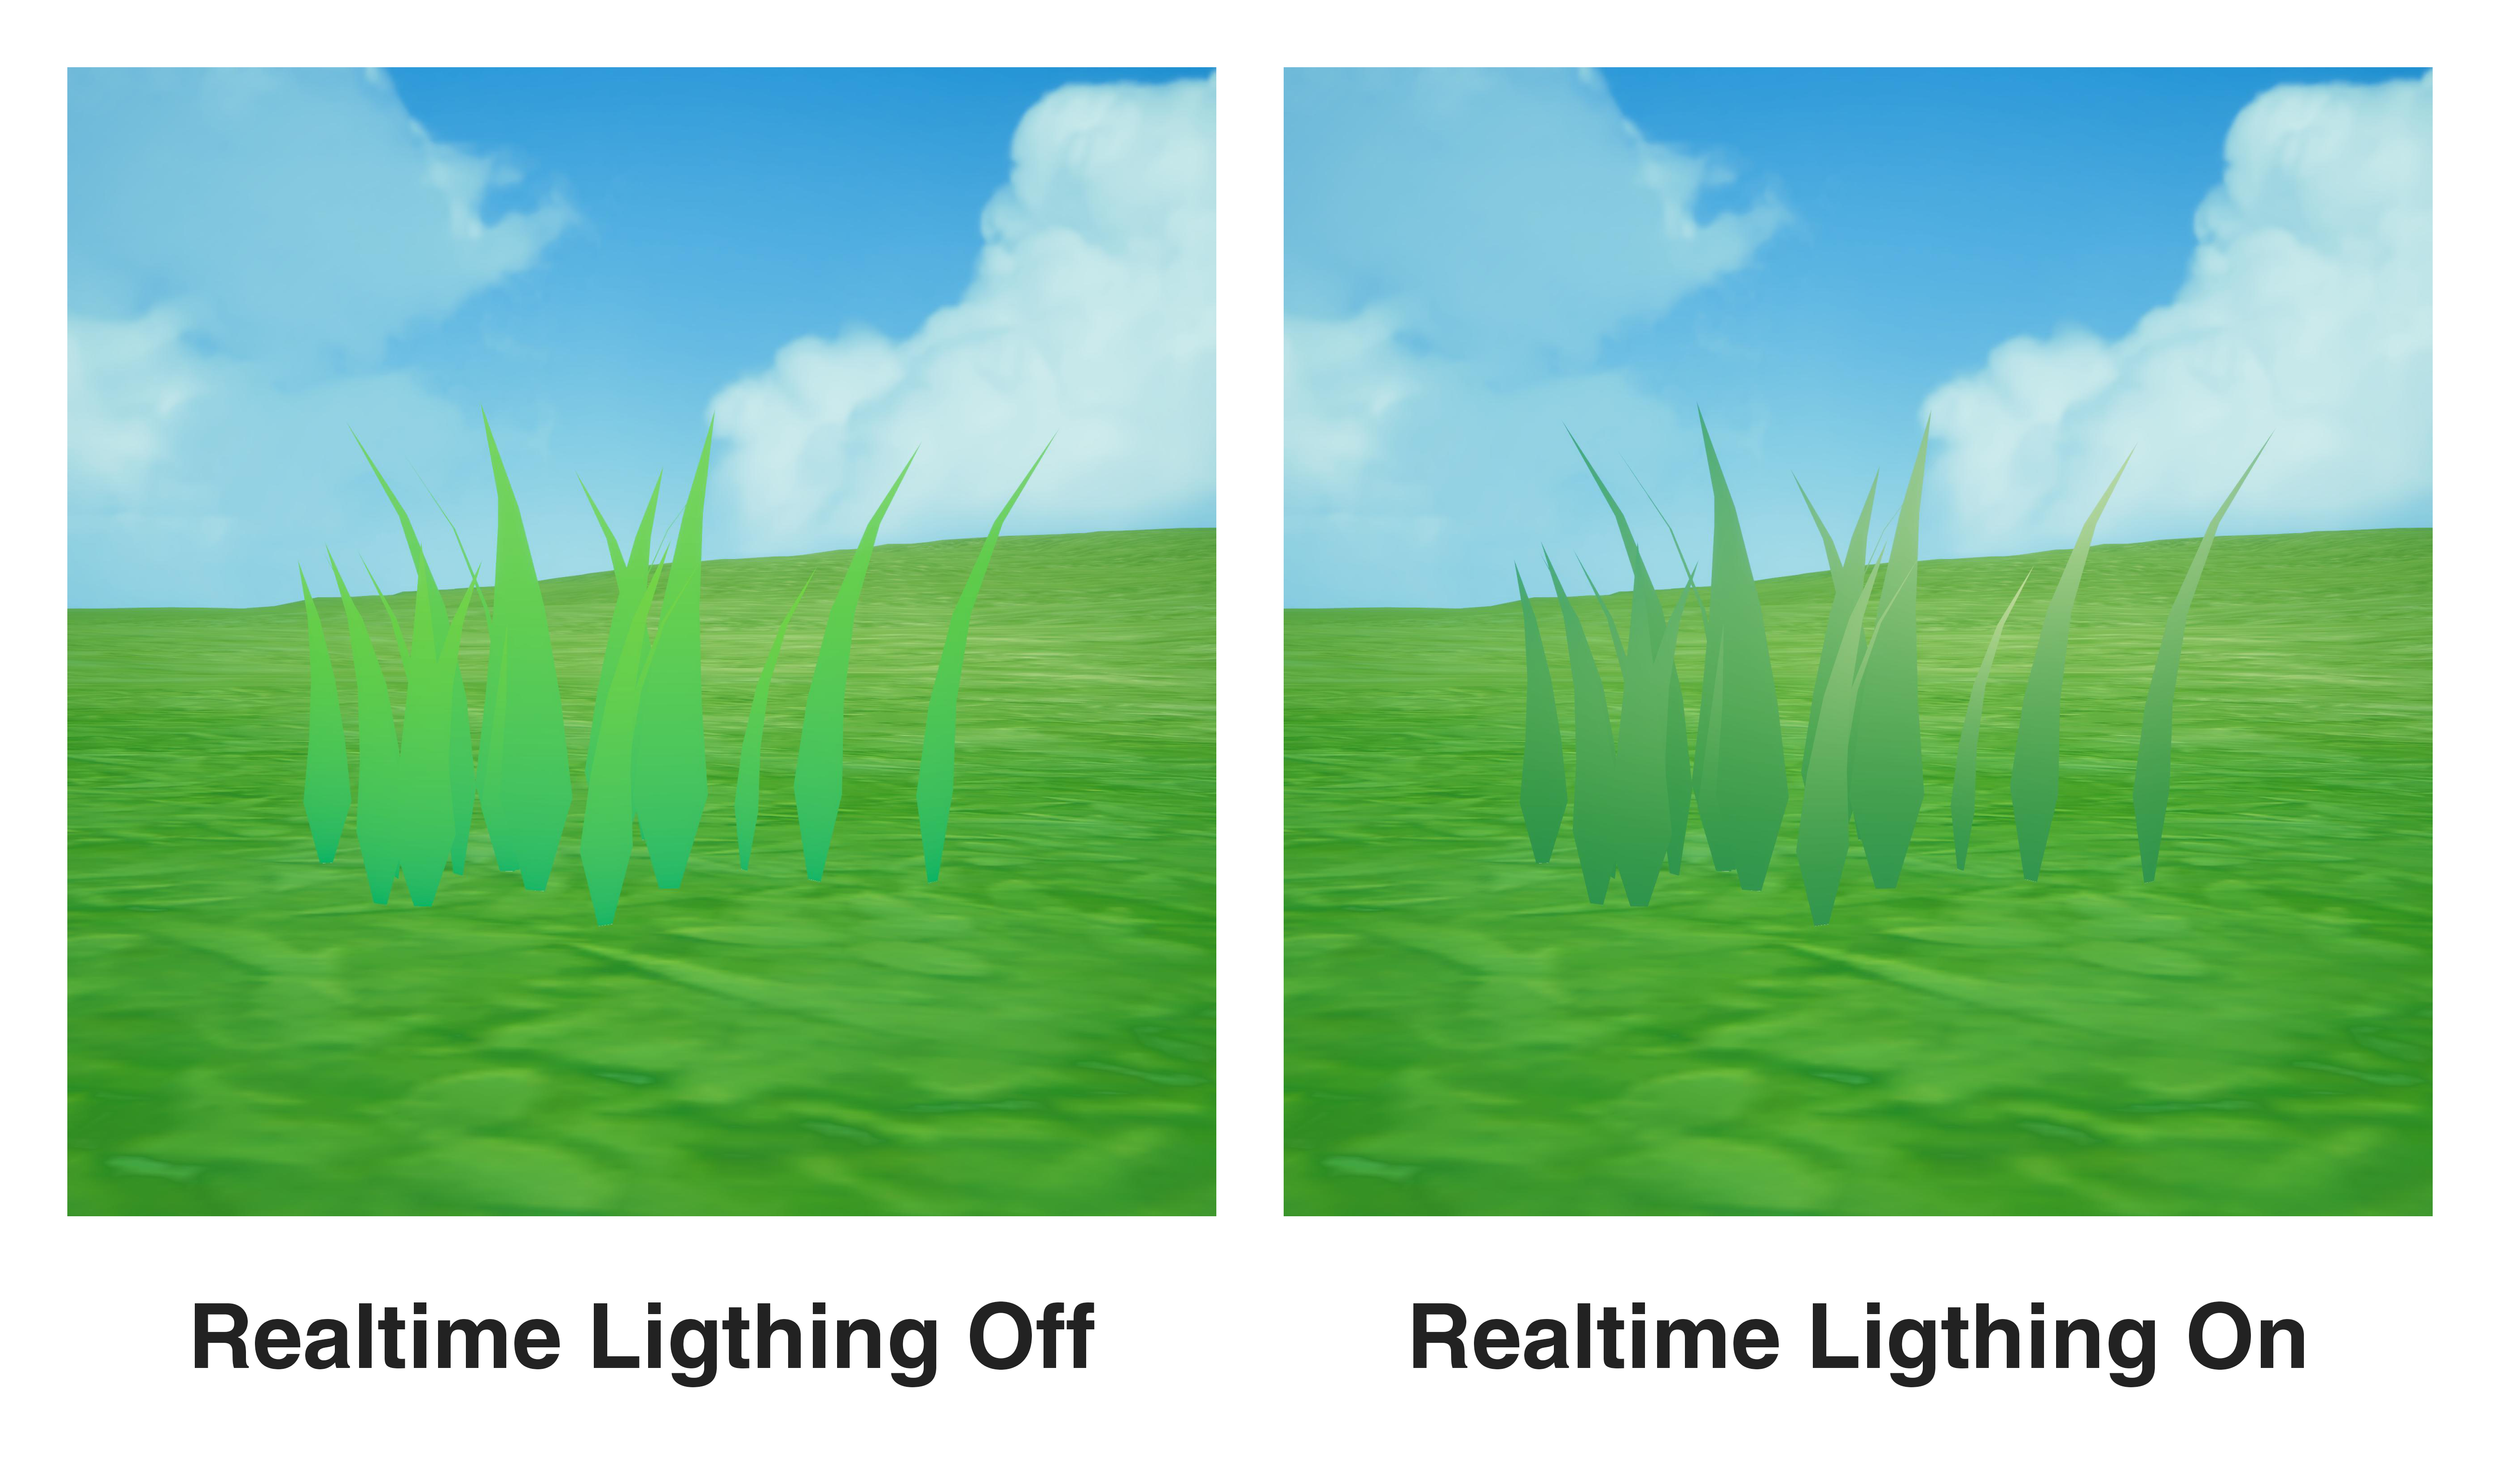
Lighting:
The grass shader support both realtime lighting and unlit mode.
For VR optimization, we use only unlit mode in the actual project.
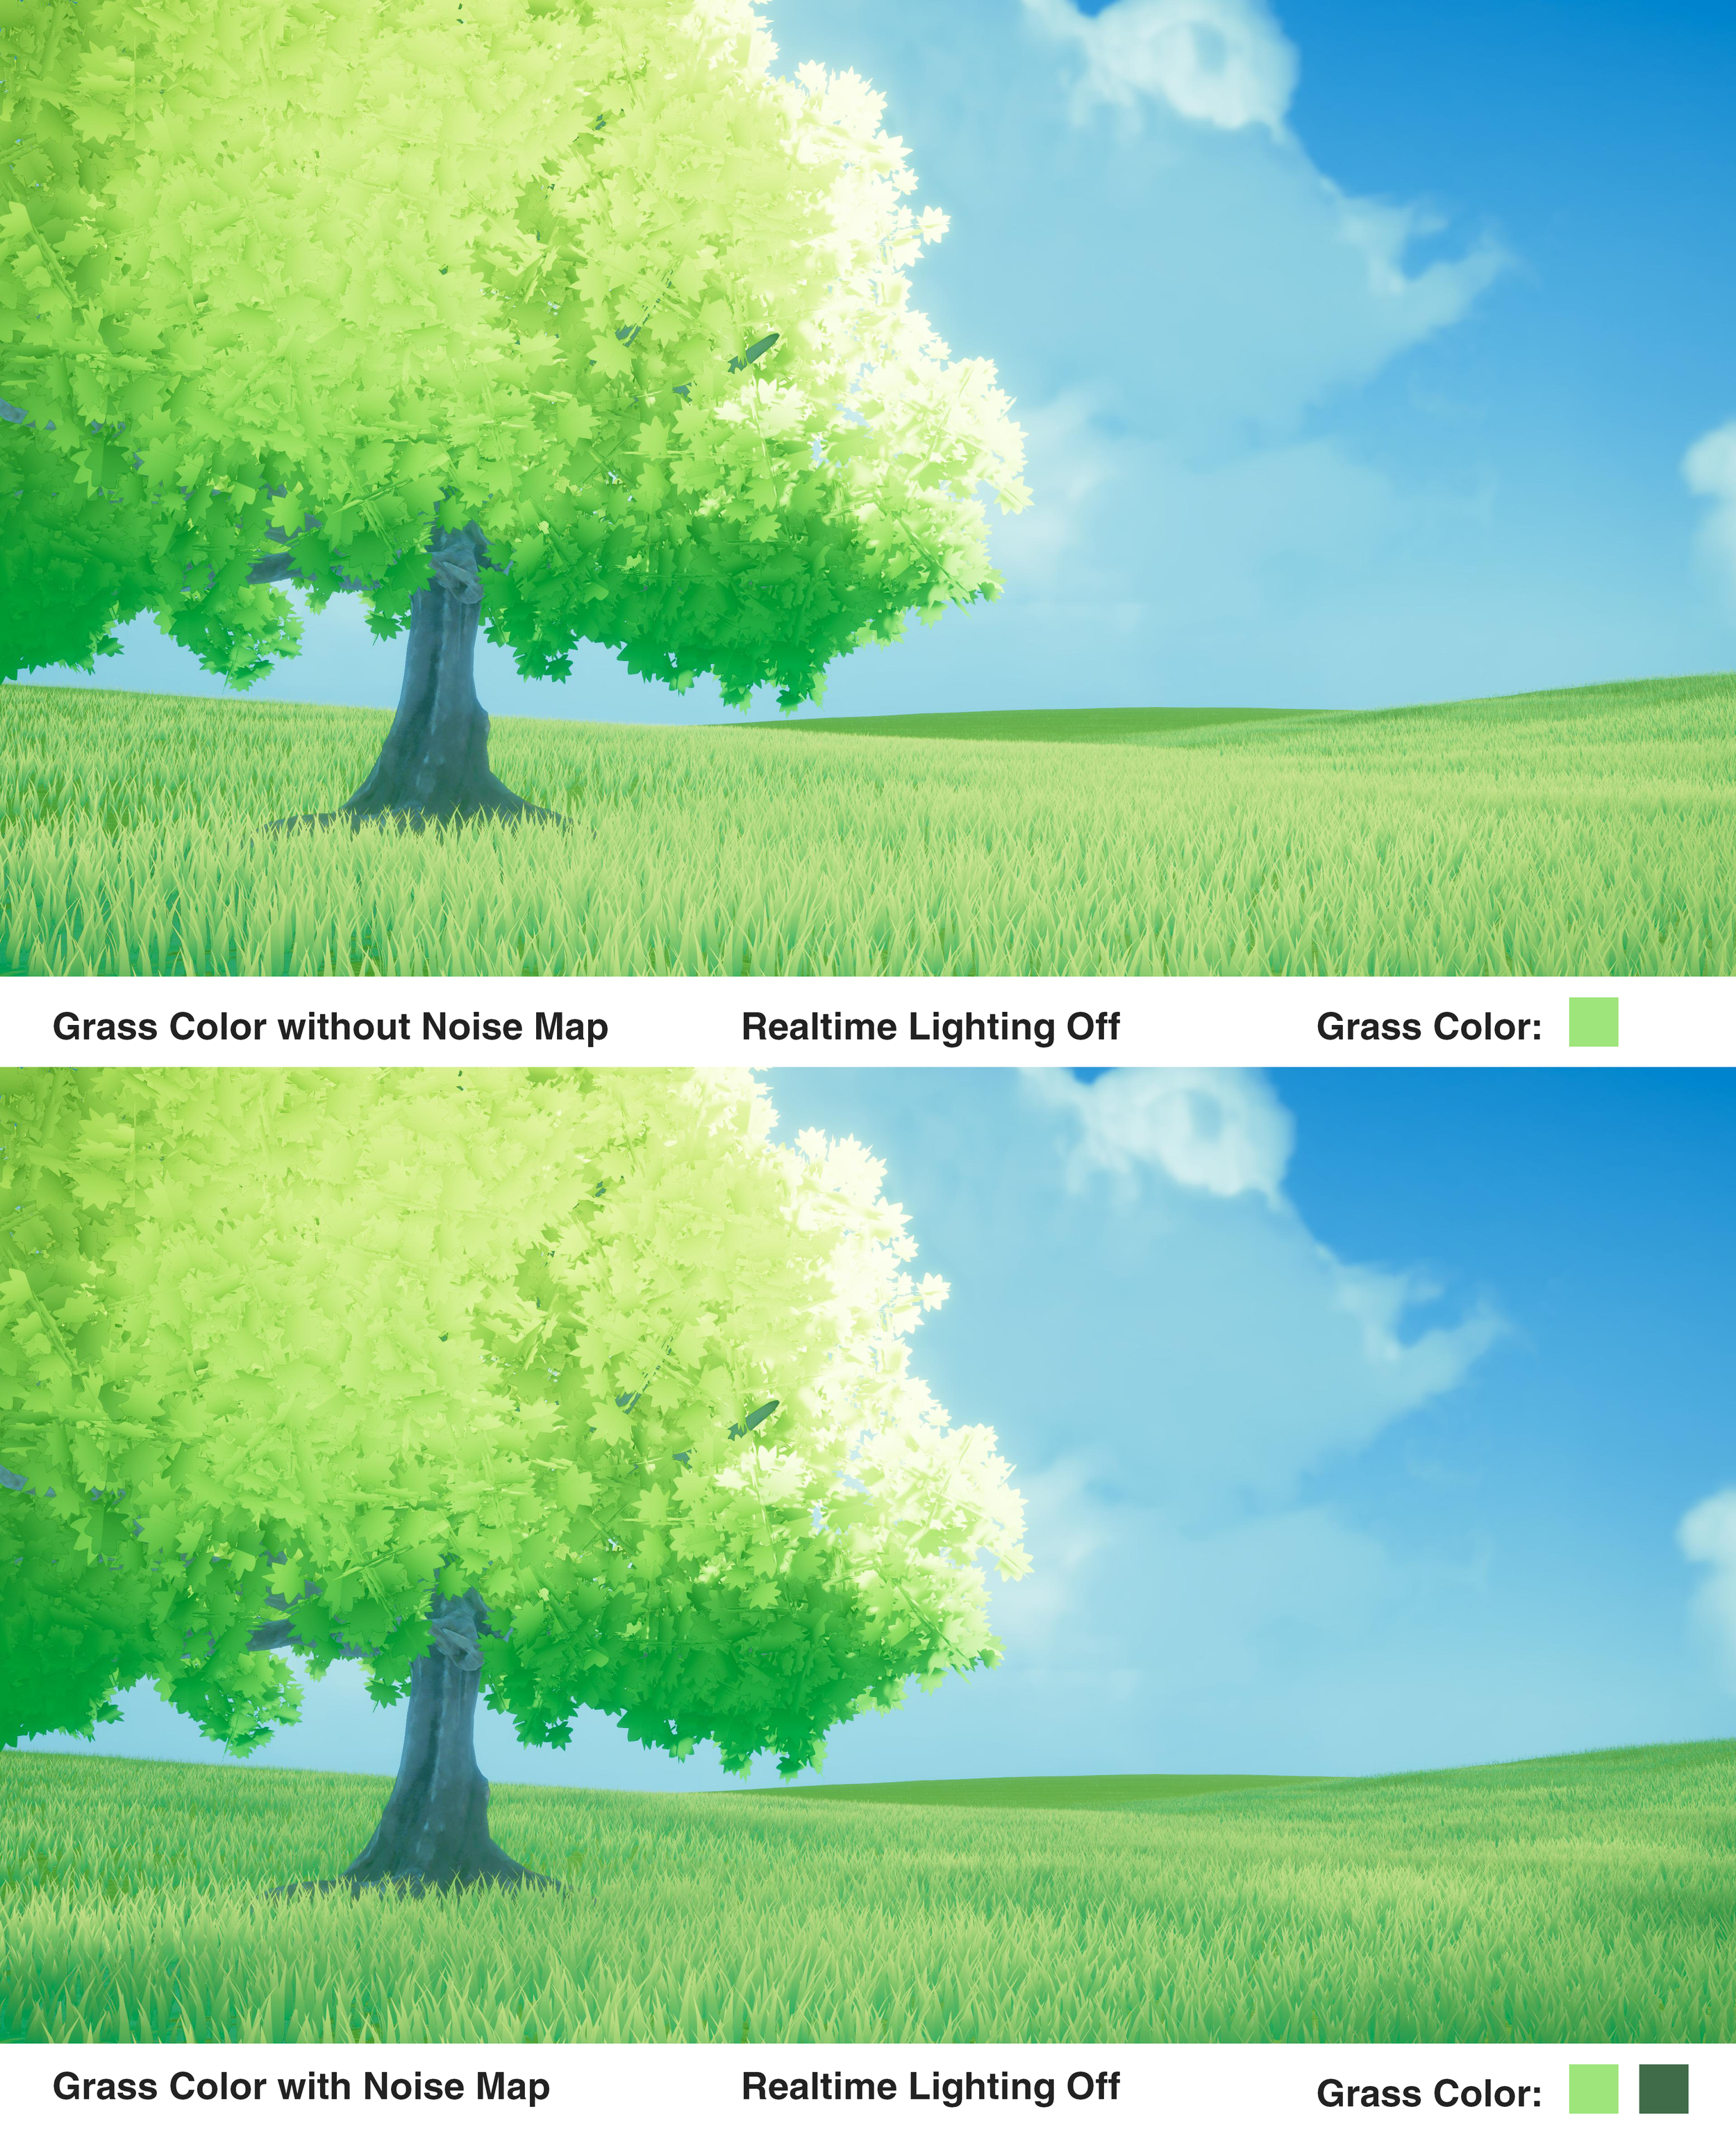
World Space Color Variation:
We sample a low-frequency noise texture in world space to achieve a natural look at large scale. This approach can also be used to approximate moving cloud shadows

Motion:
Wind motion is built from two parts in the compute pass:
The first is a local sway effect ("jiggle") that applies movement to each segment, gradient from top to bottom.
The second is a world-space displacement, driven by a slowly scrolling noise texture, which creates broad, cohesive gusts.
To further enhance the effect, we slightly increasing brightness and saturation near the tips in the fragment pass during gusts.
Noise Map for Color Variation
Noise Map for Wind Motion
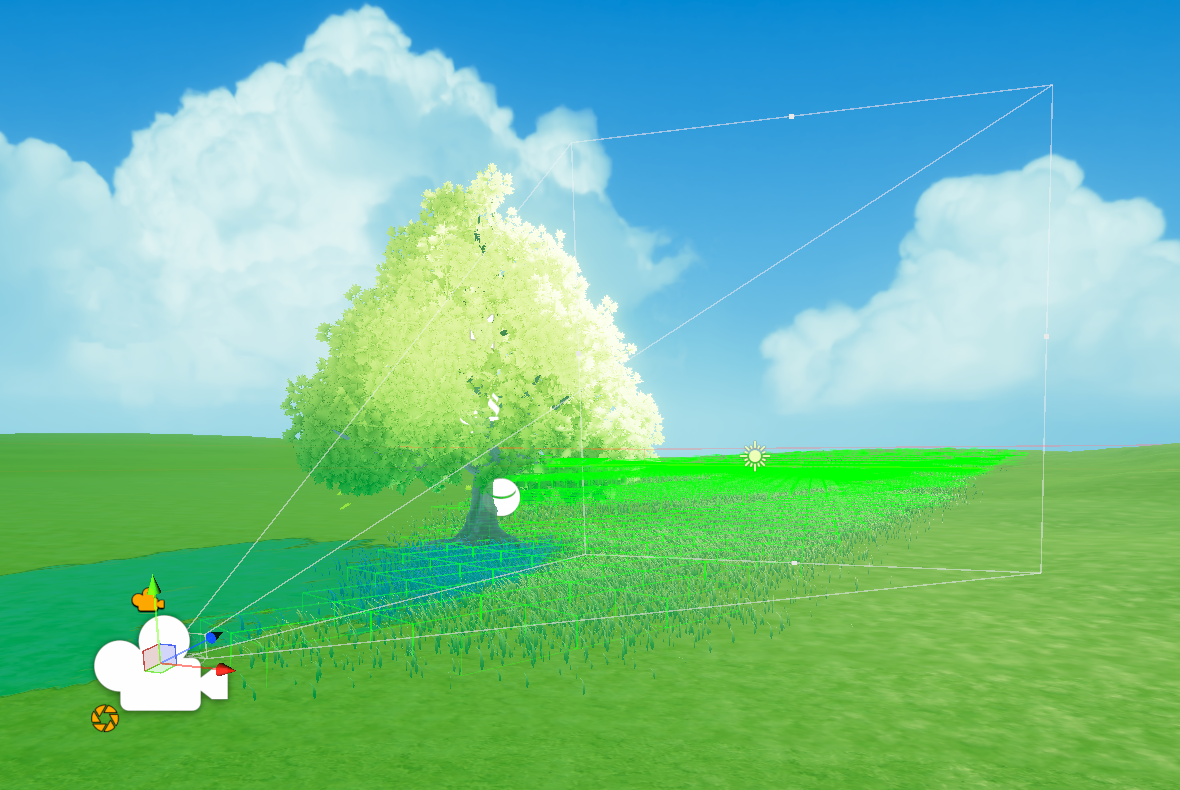
Frustum Culling:
In the early stage of the compute pass, we partition the scene with a octree and reject grass whose vertices lie outside the camera frustum.
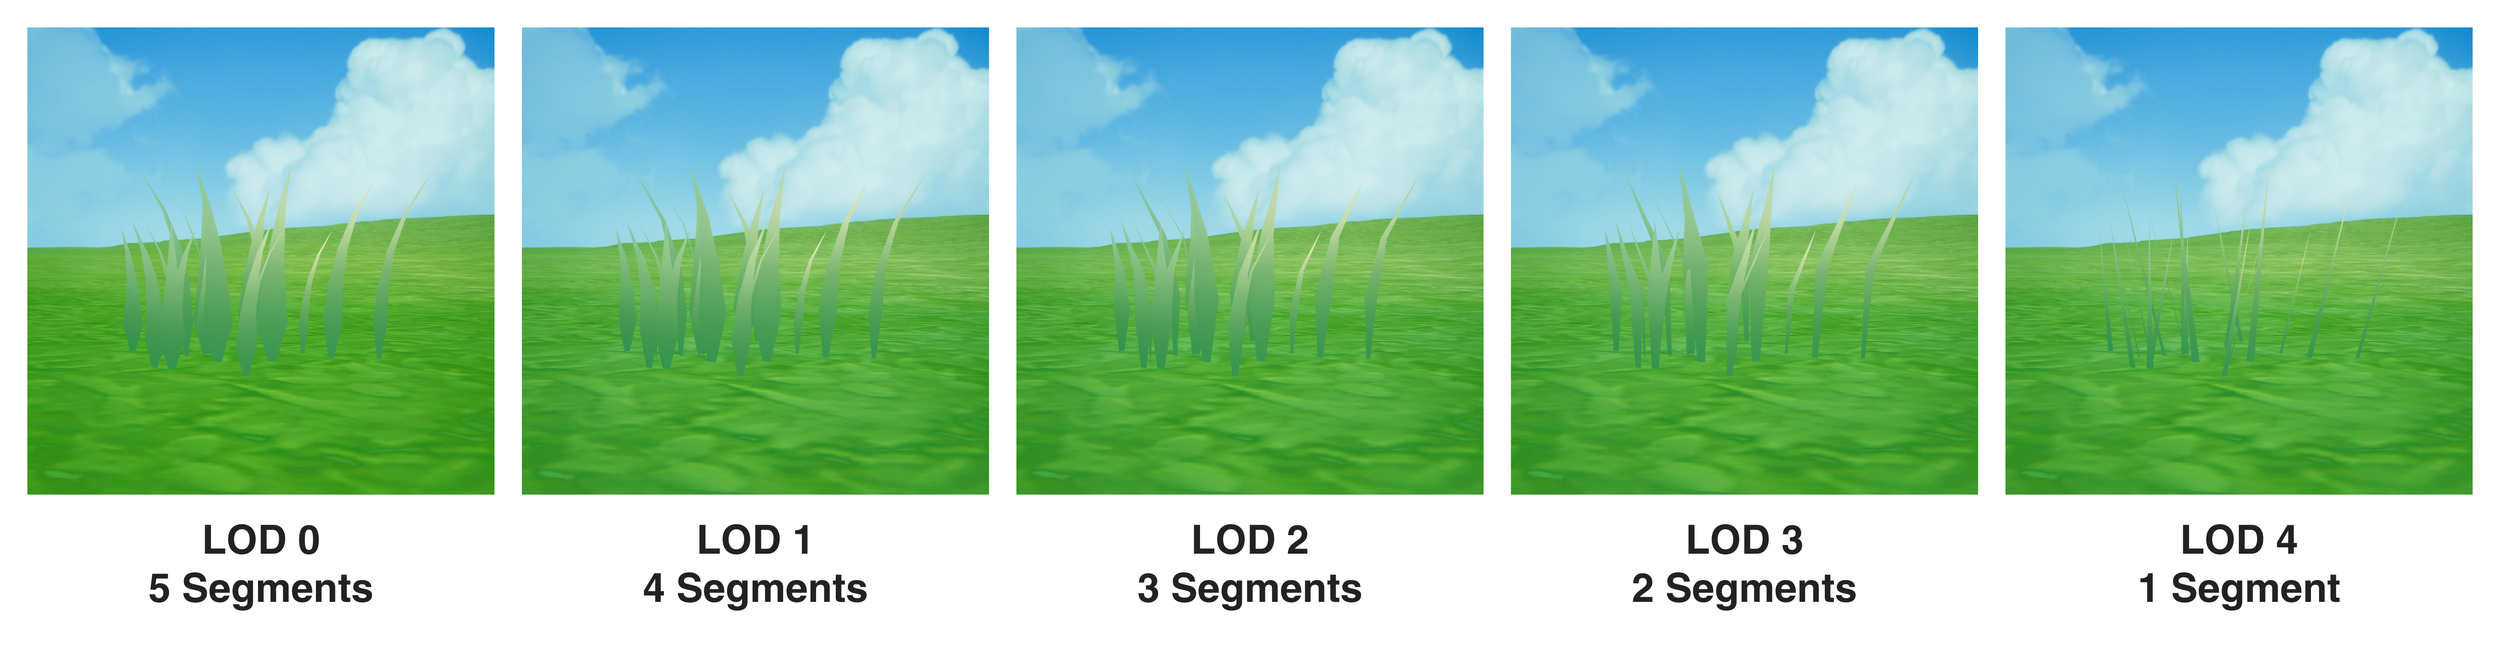
LOD: Segment Count per Blade
We also computes segment count based on camera distance.
Optimization:
Authoring:
Grass Painting Tool for Artists:
To input the source vertices into the compute shader, we built an in-editor grass painting tool and exposed parameters to give artists creative control.

Stylized Tree Rendering and Pipeline:

Tree Assets Creation Pipeline:
This stylized tree is not only a key asset in our game, but also serves as a pipeline guideline for our artists.
Trunk and branches:
The tree model was created in Blender following the standard workflow: sculpt a high-poly mesh, retopologize it to a low-poly mesh, and unwrap the UVs

High-poly Mesh
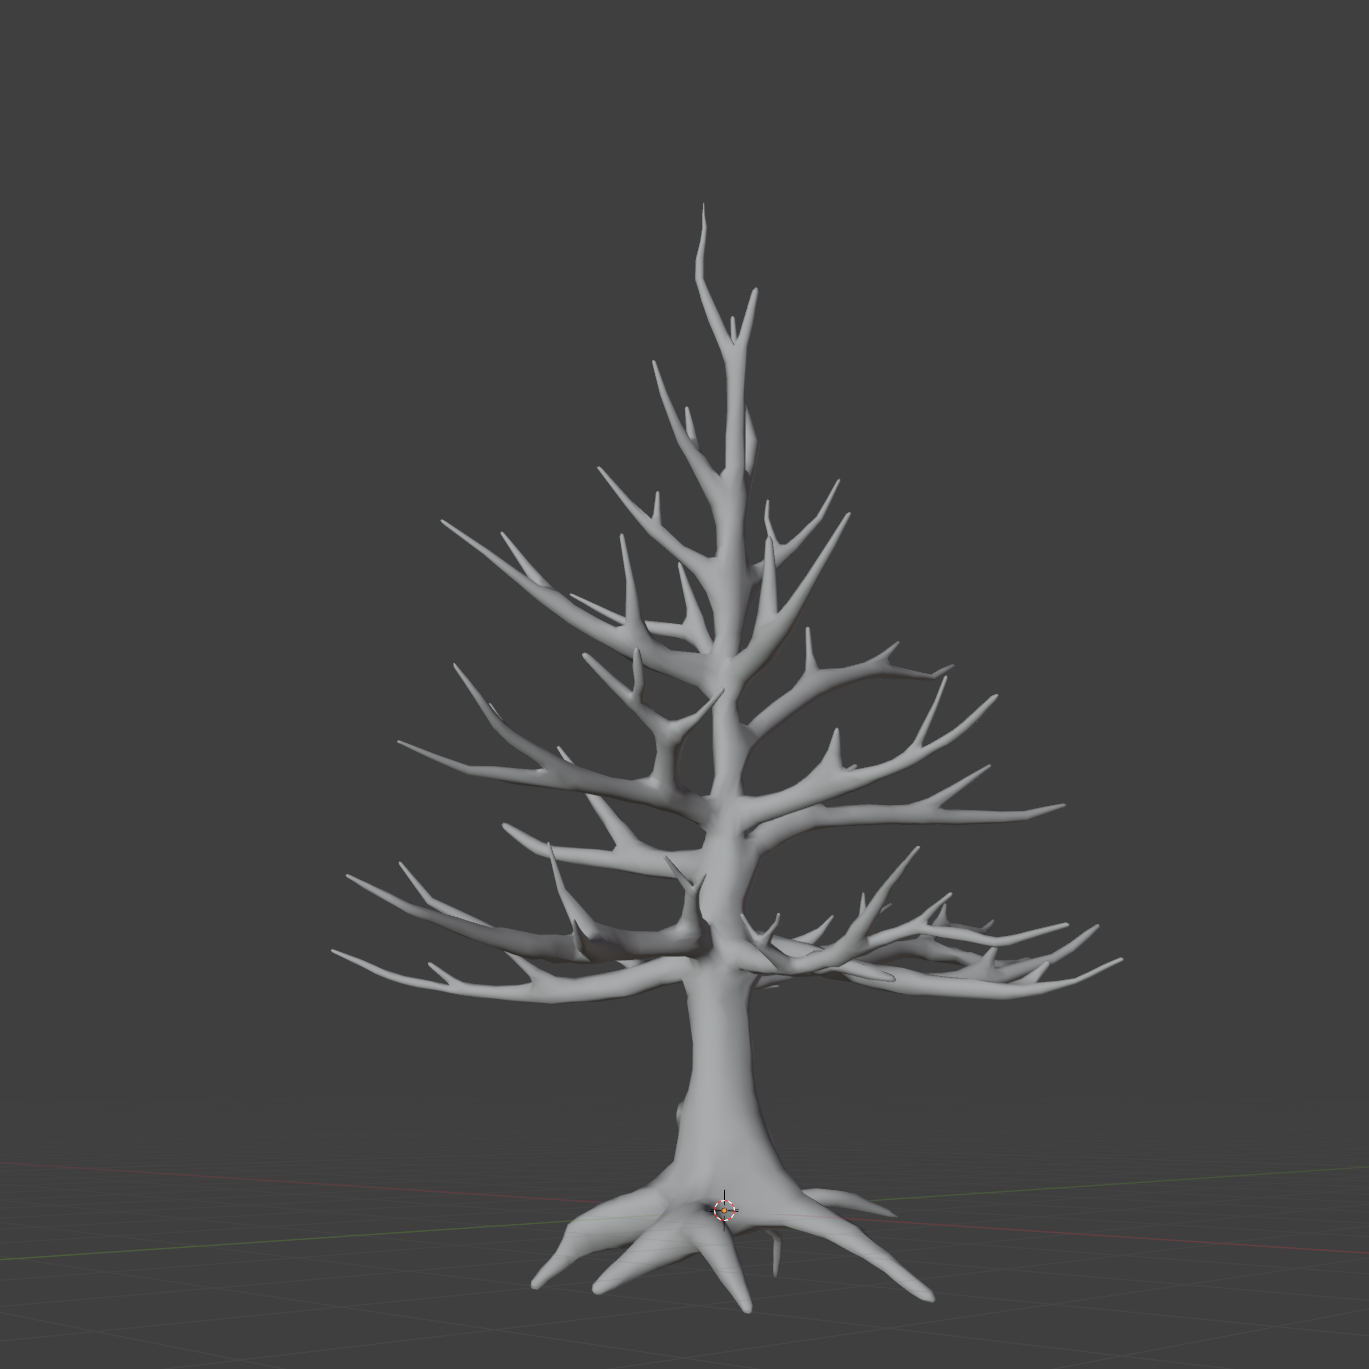
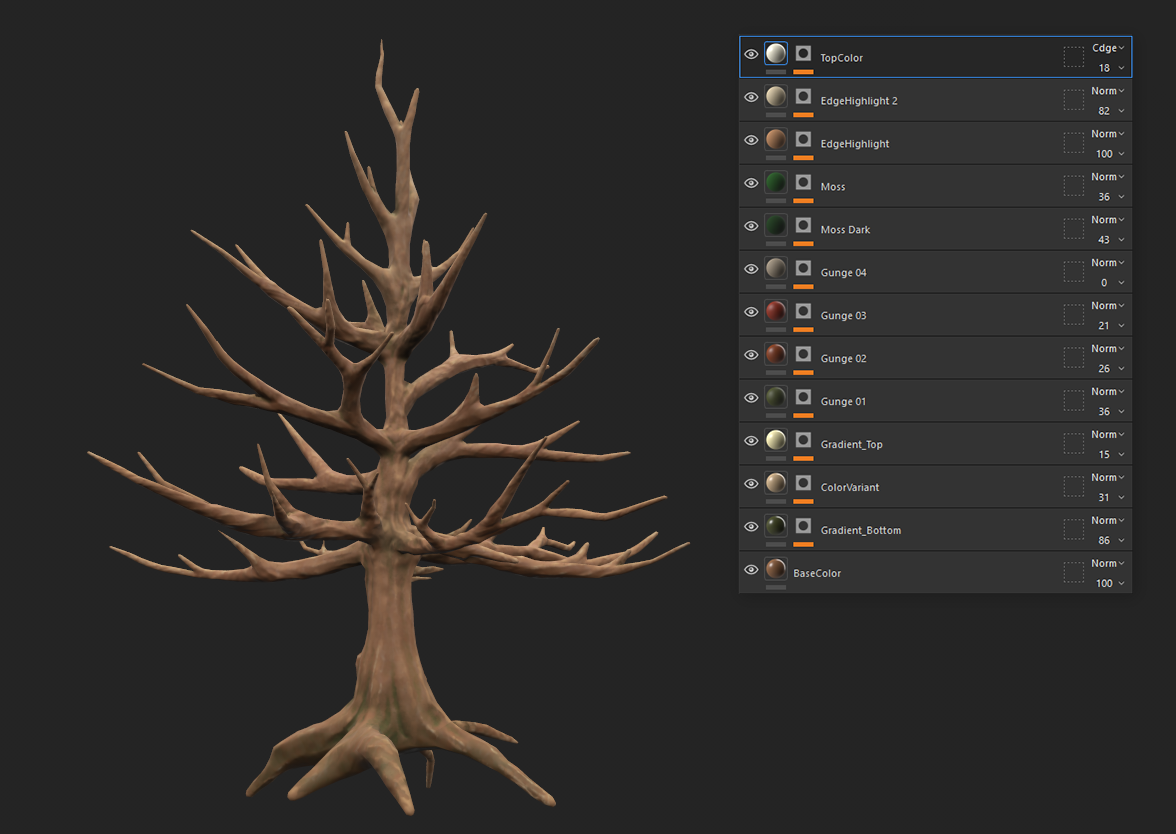
Low-poly Mesh
In Adobe Substance 3D Painter, we baked the high-poly mesh onto the low-poly (normal, AO, curvature, etc.) and then authored the PBR textures.
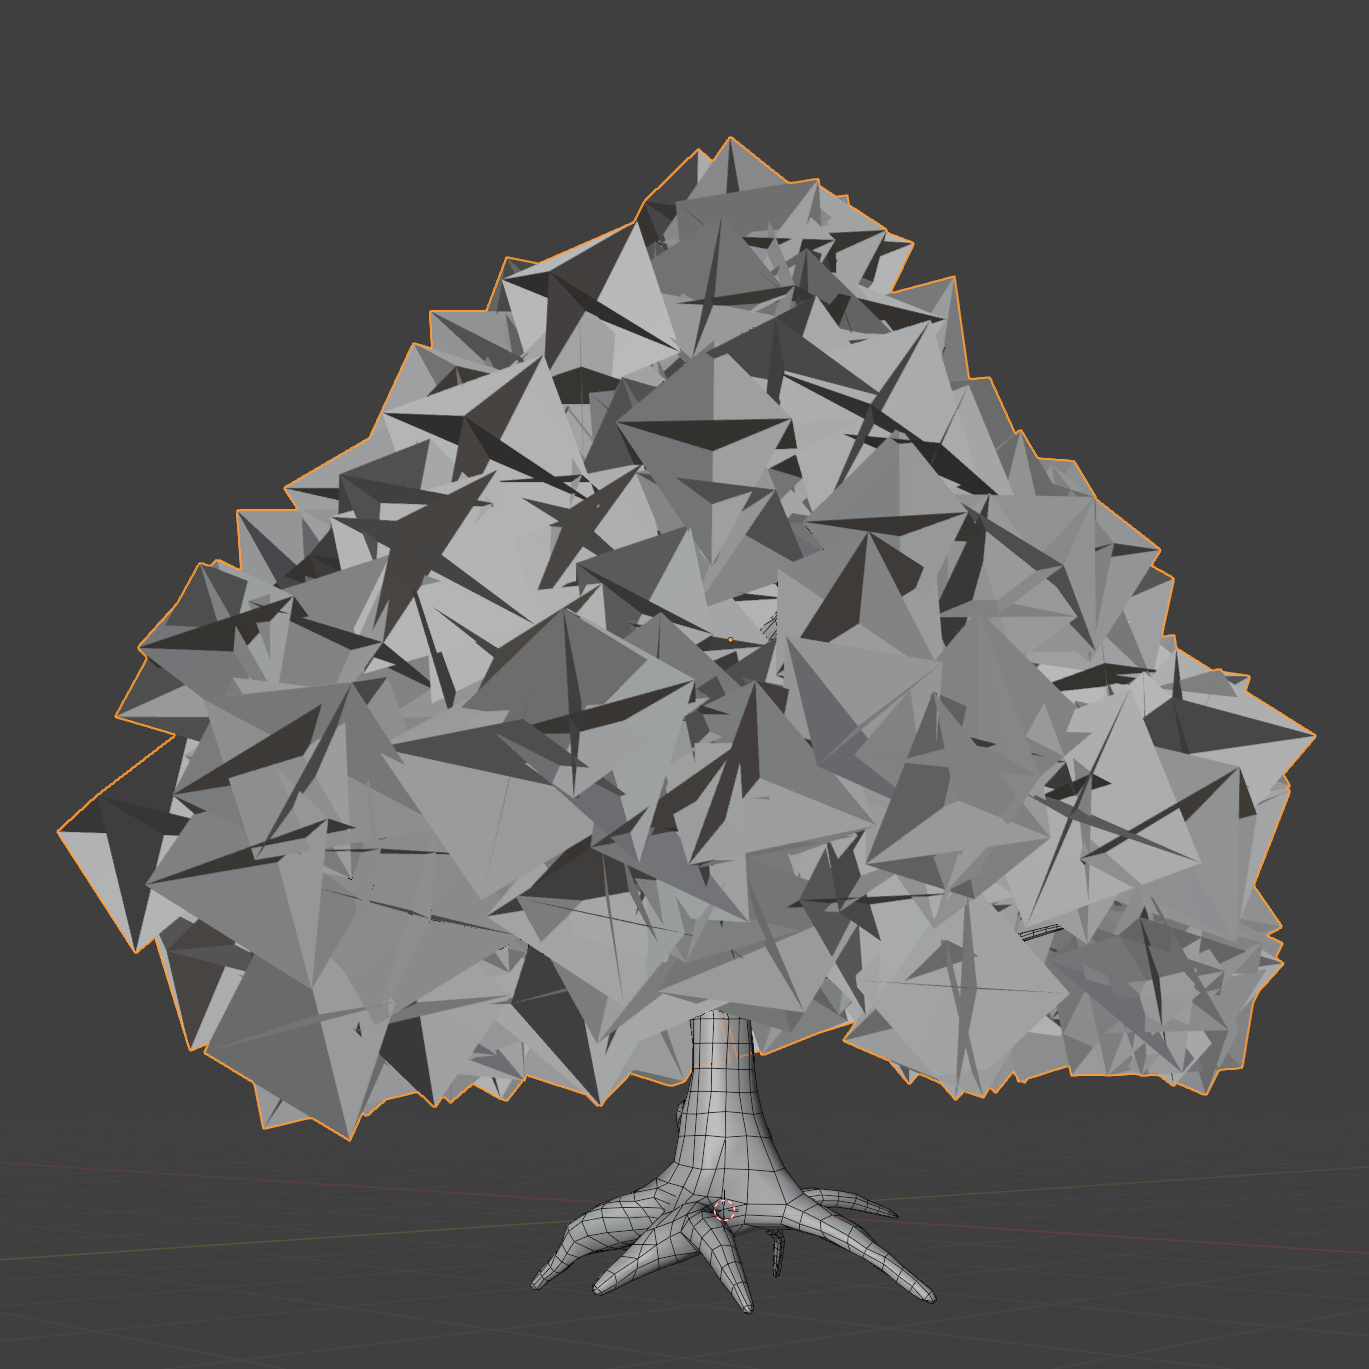
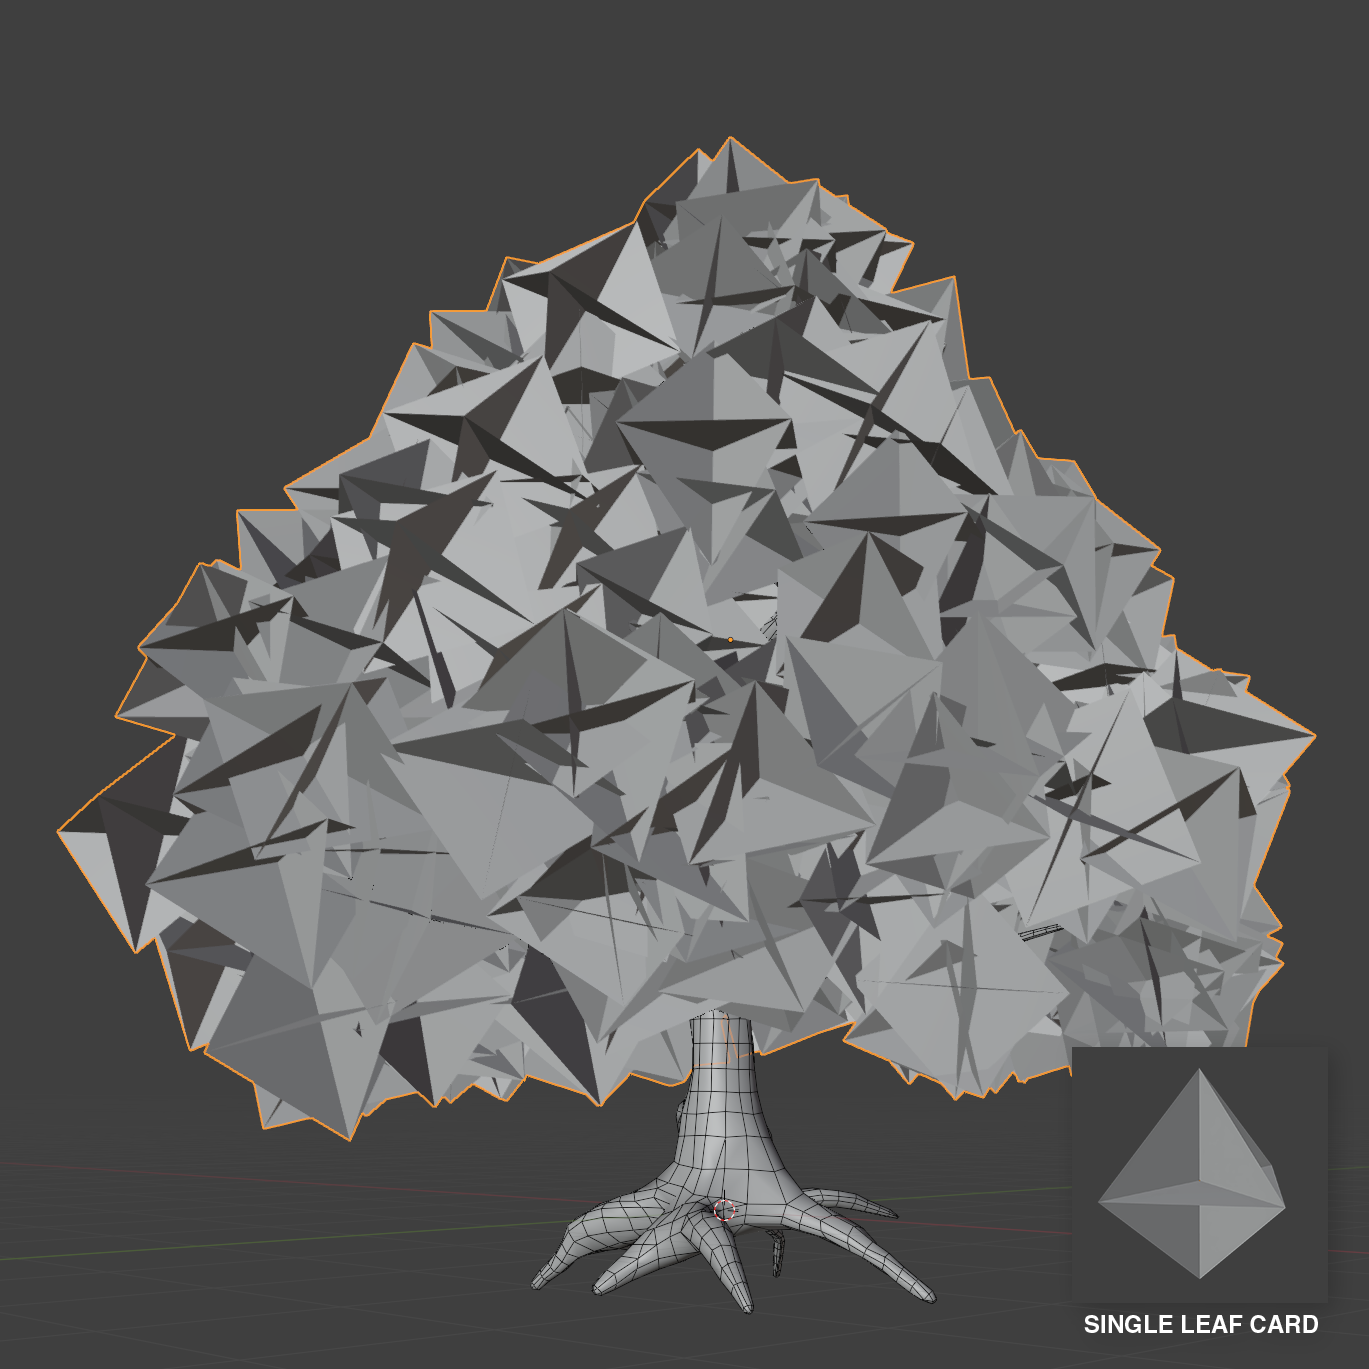
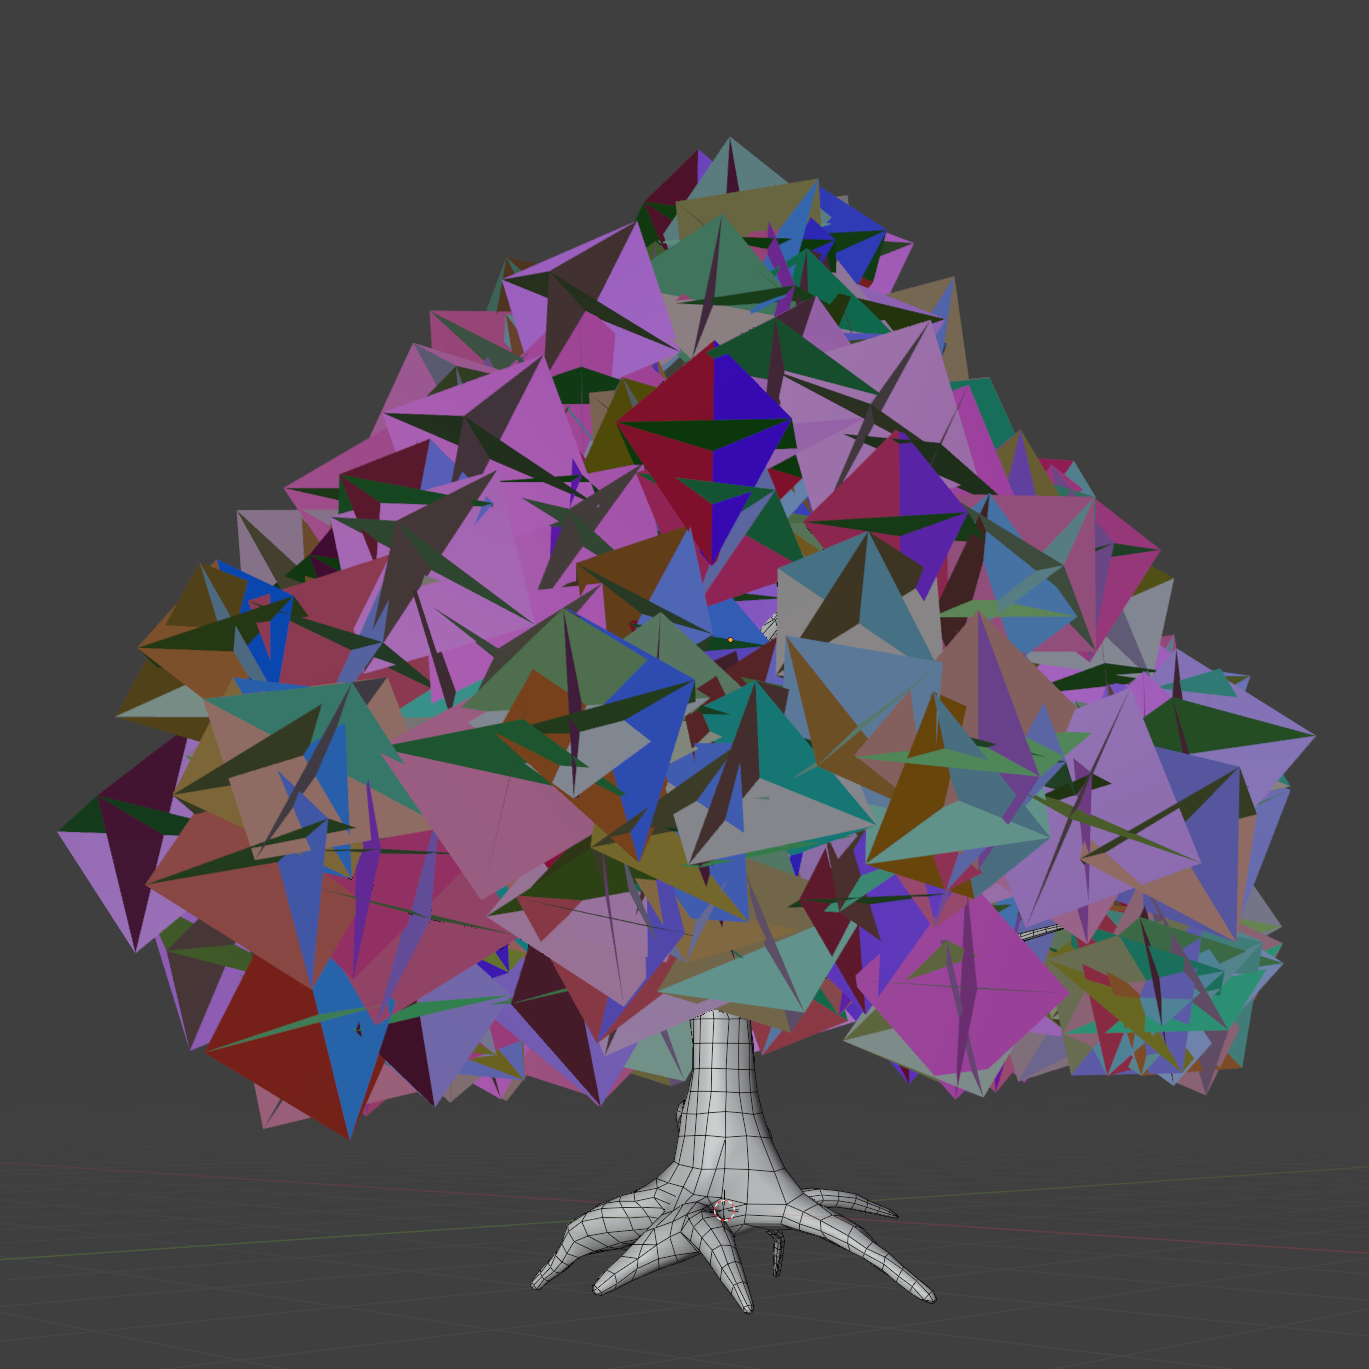
Tree Canopy:
We build the canopy using alpha-cutout cards. After modeling a low-poly canopy envelope, we author a single leaf card composed of three intersecting quads (cross planes) mapped to a leaf texture with an alpha mask. Using Blender’s Geometry Nodes, we scatter instances of this card throughout the envelope, with randomized rotation/scale, and density controls to shape volume.

Shading Before

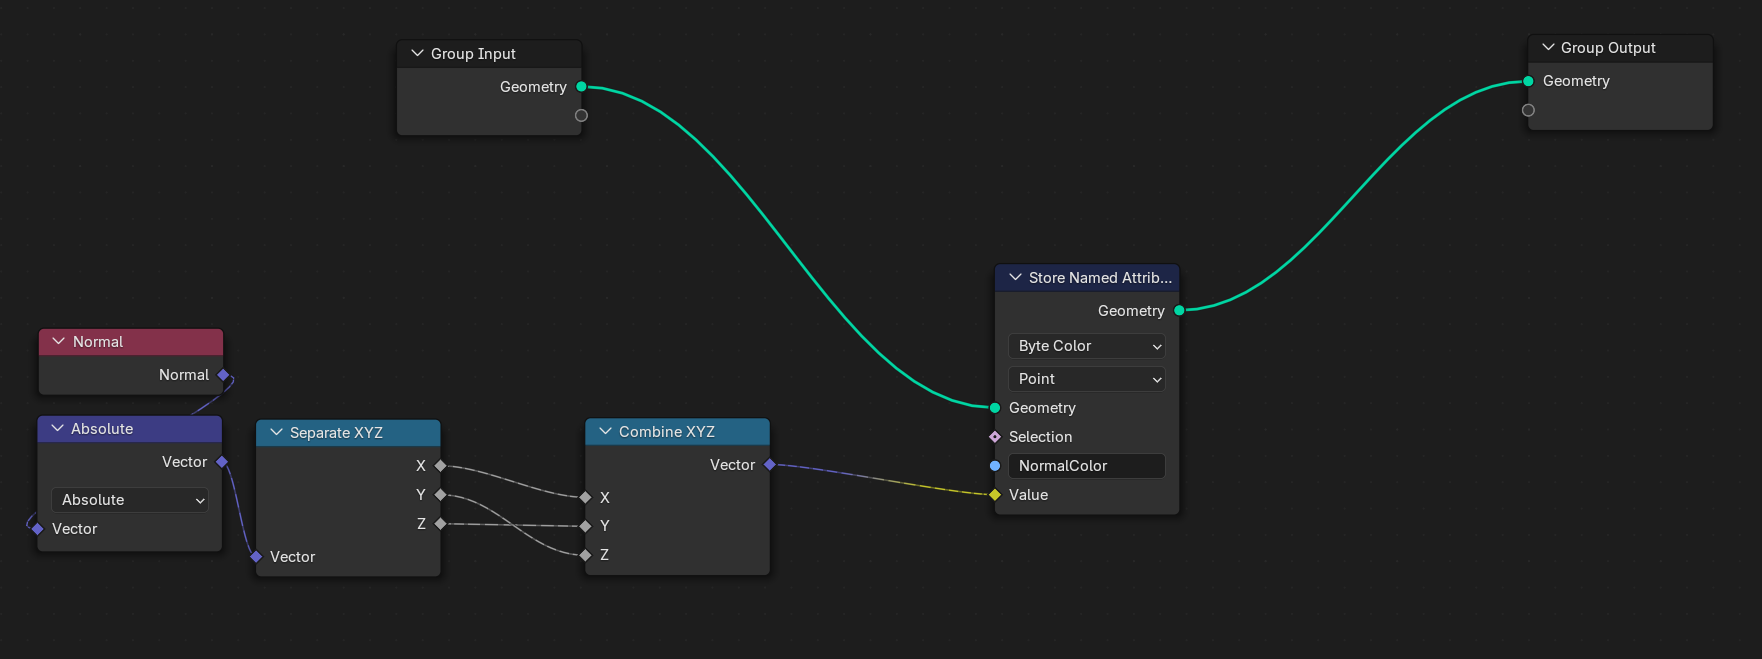
We plan to compute v ⋅ n (view direction · card normal) in the shader. To preserve the card’s original face normals through export—since we’ll override shading normals in the next step—we use Geometry Nodes again to write each face normal into a vertex-color channel.
Baked Vertex Color
To achieve smooth shading across the leaf cards, we replace their shading normals with a canopy-volume normal field. We model a slightly larger envelope that encloses all cards and, using Blender’s Data Transfer modifier, transfer the envelope’s custom split normals onto the card mesh.
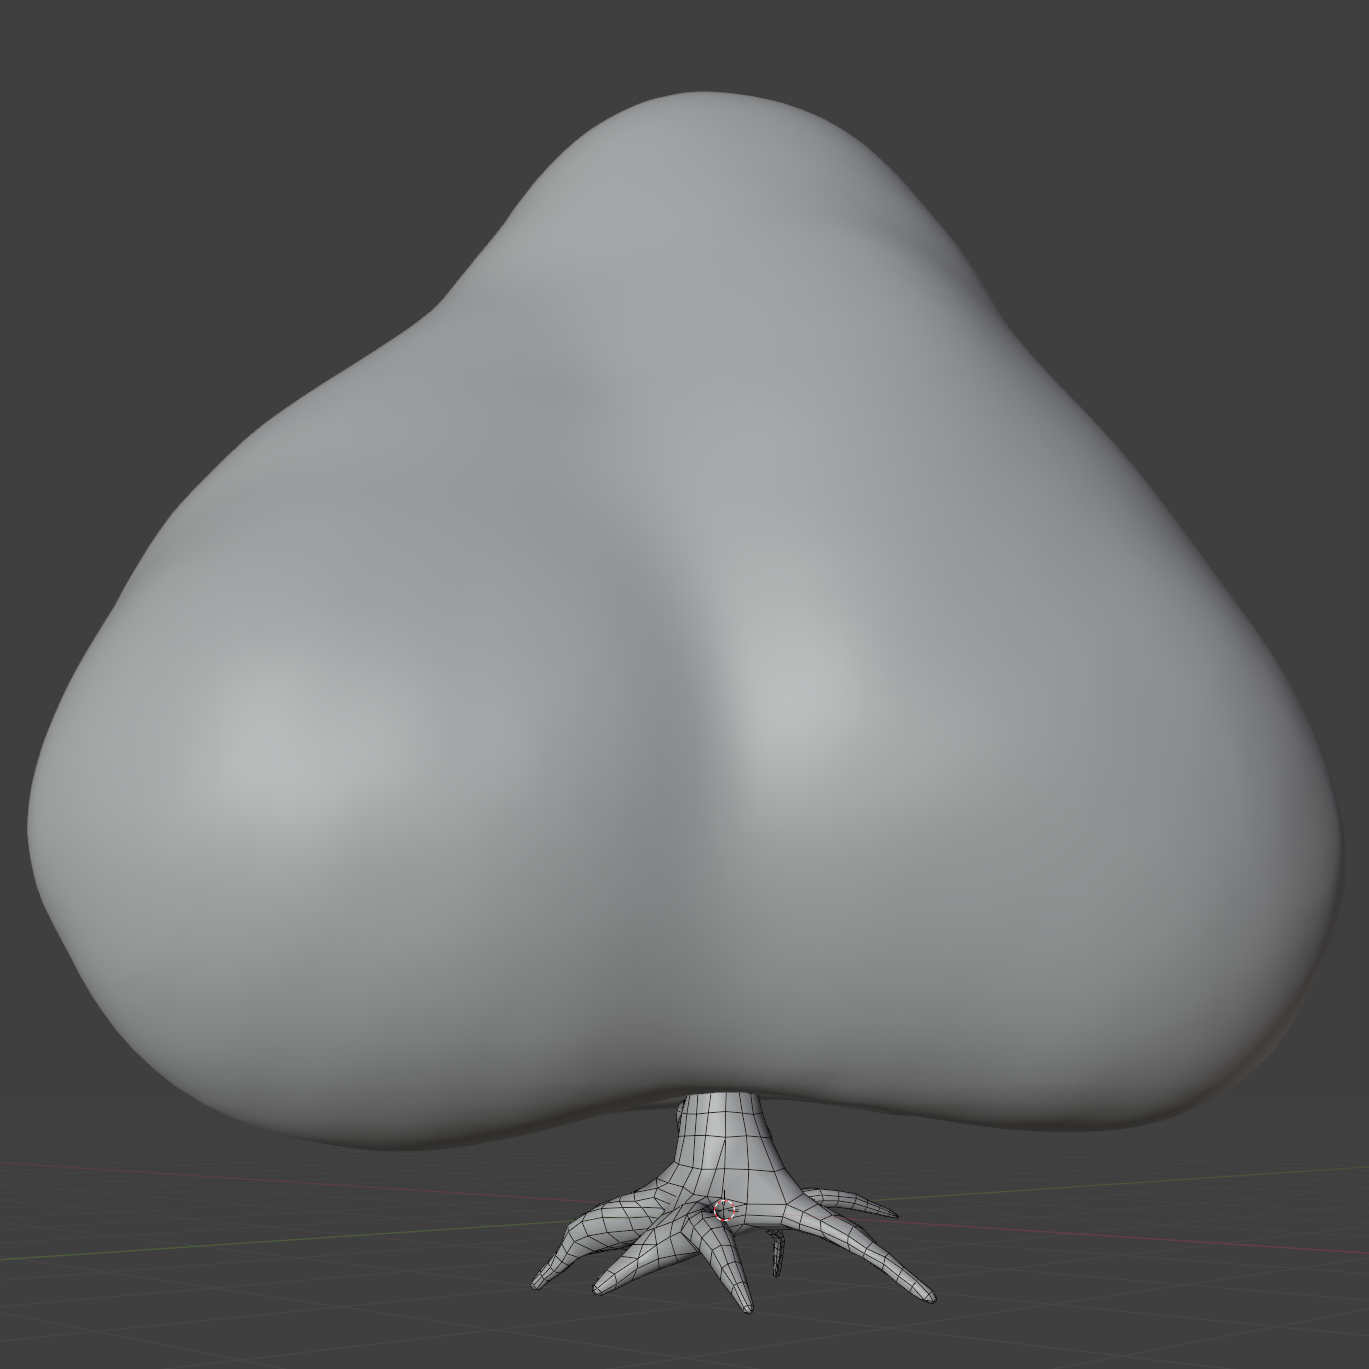
Mesh Envelope

Normal Before

Normal After
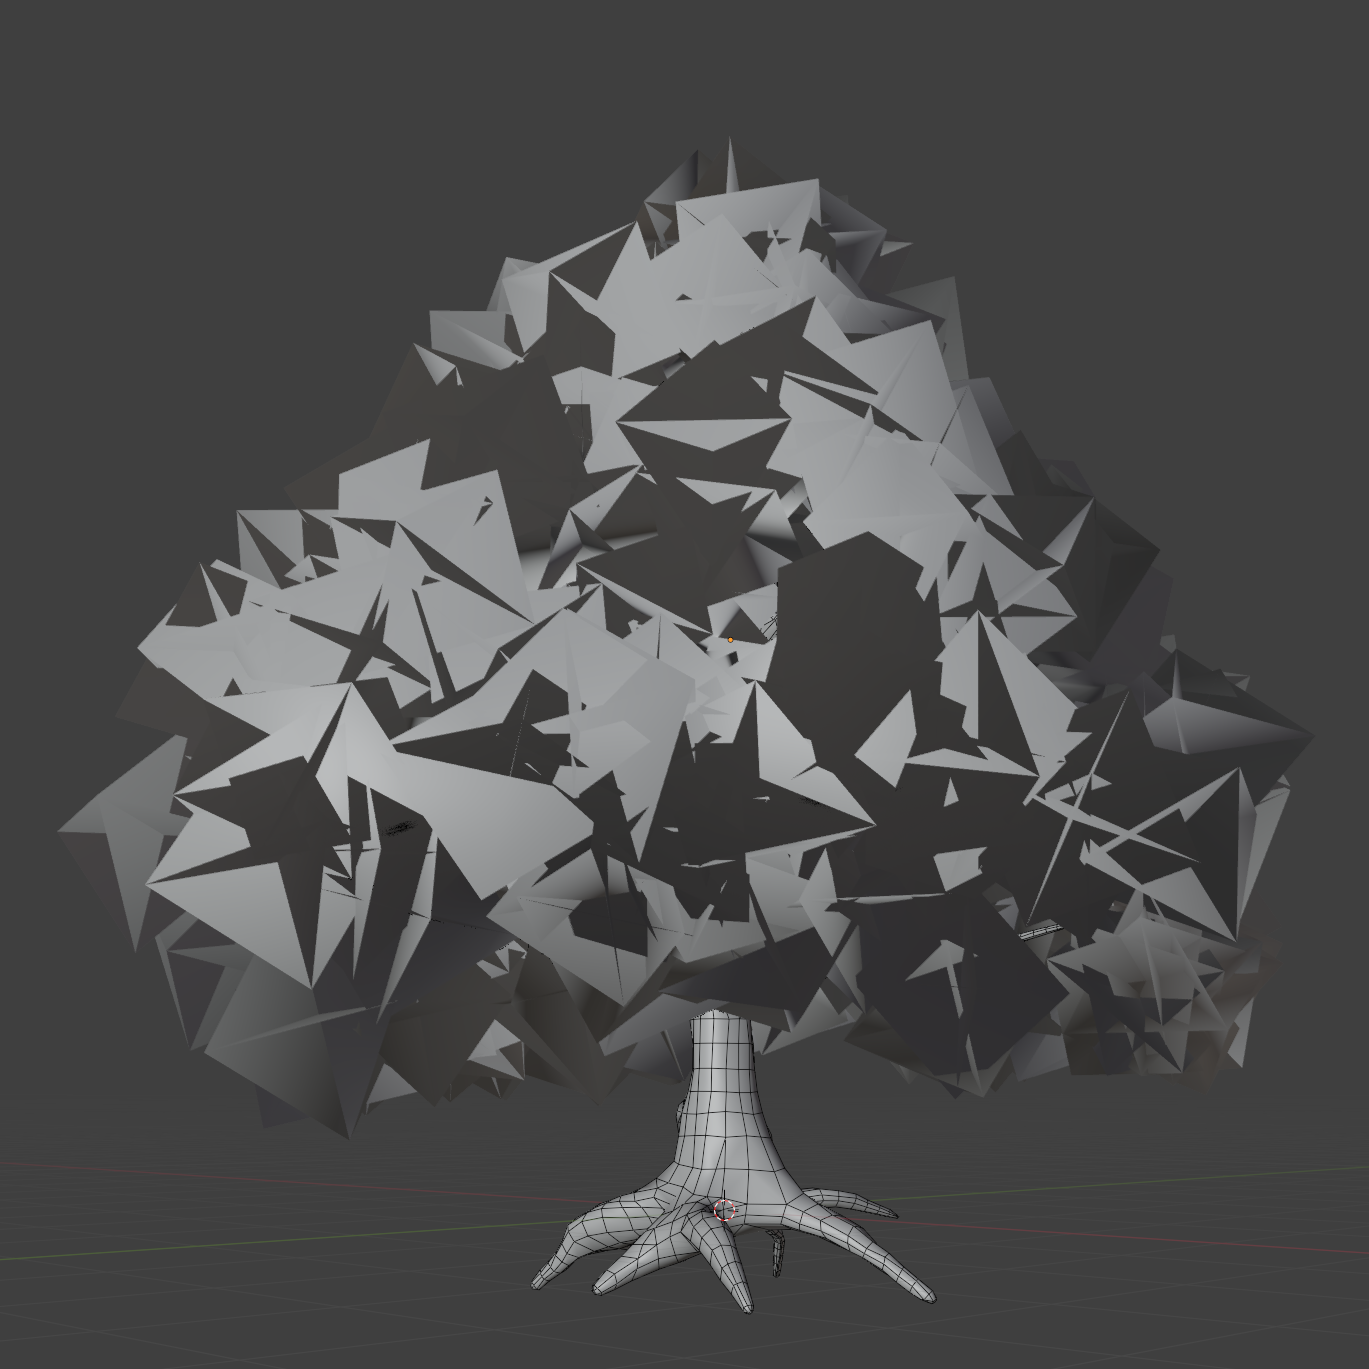
Shading After
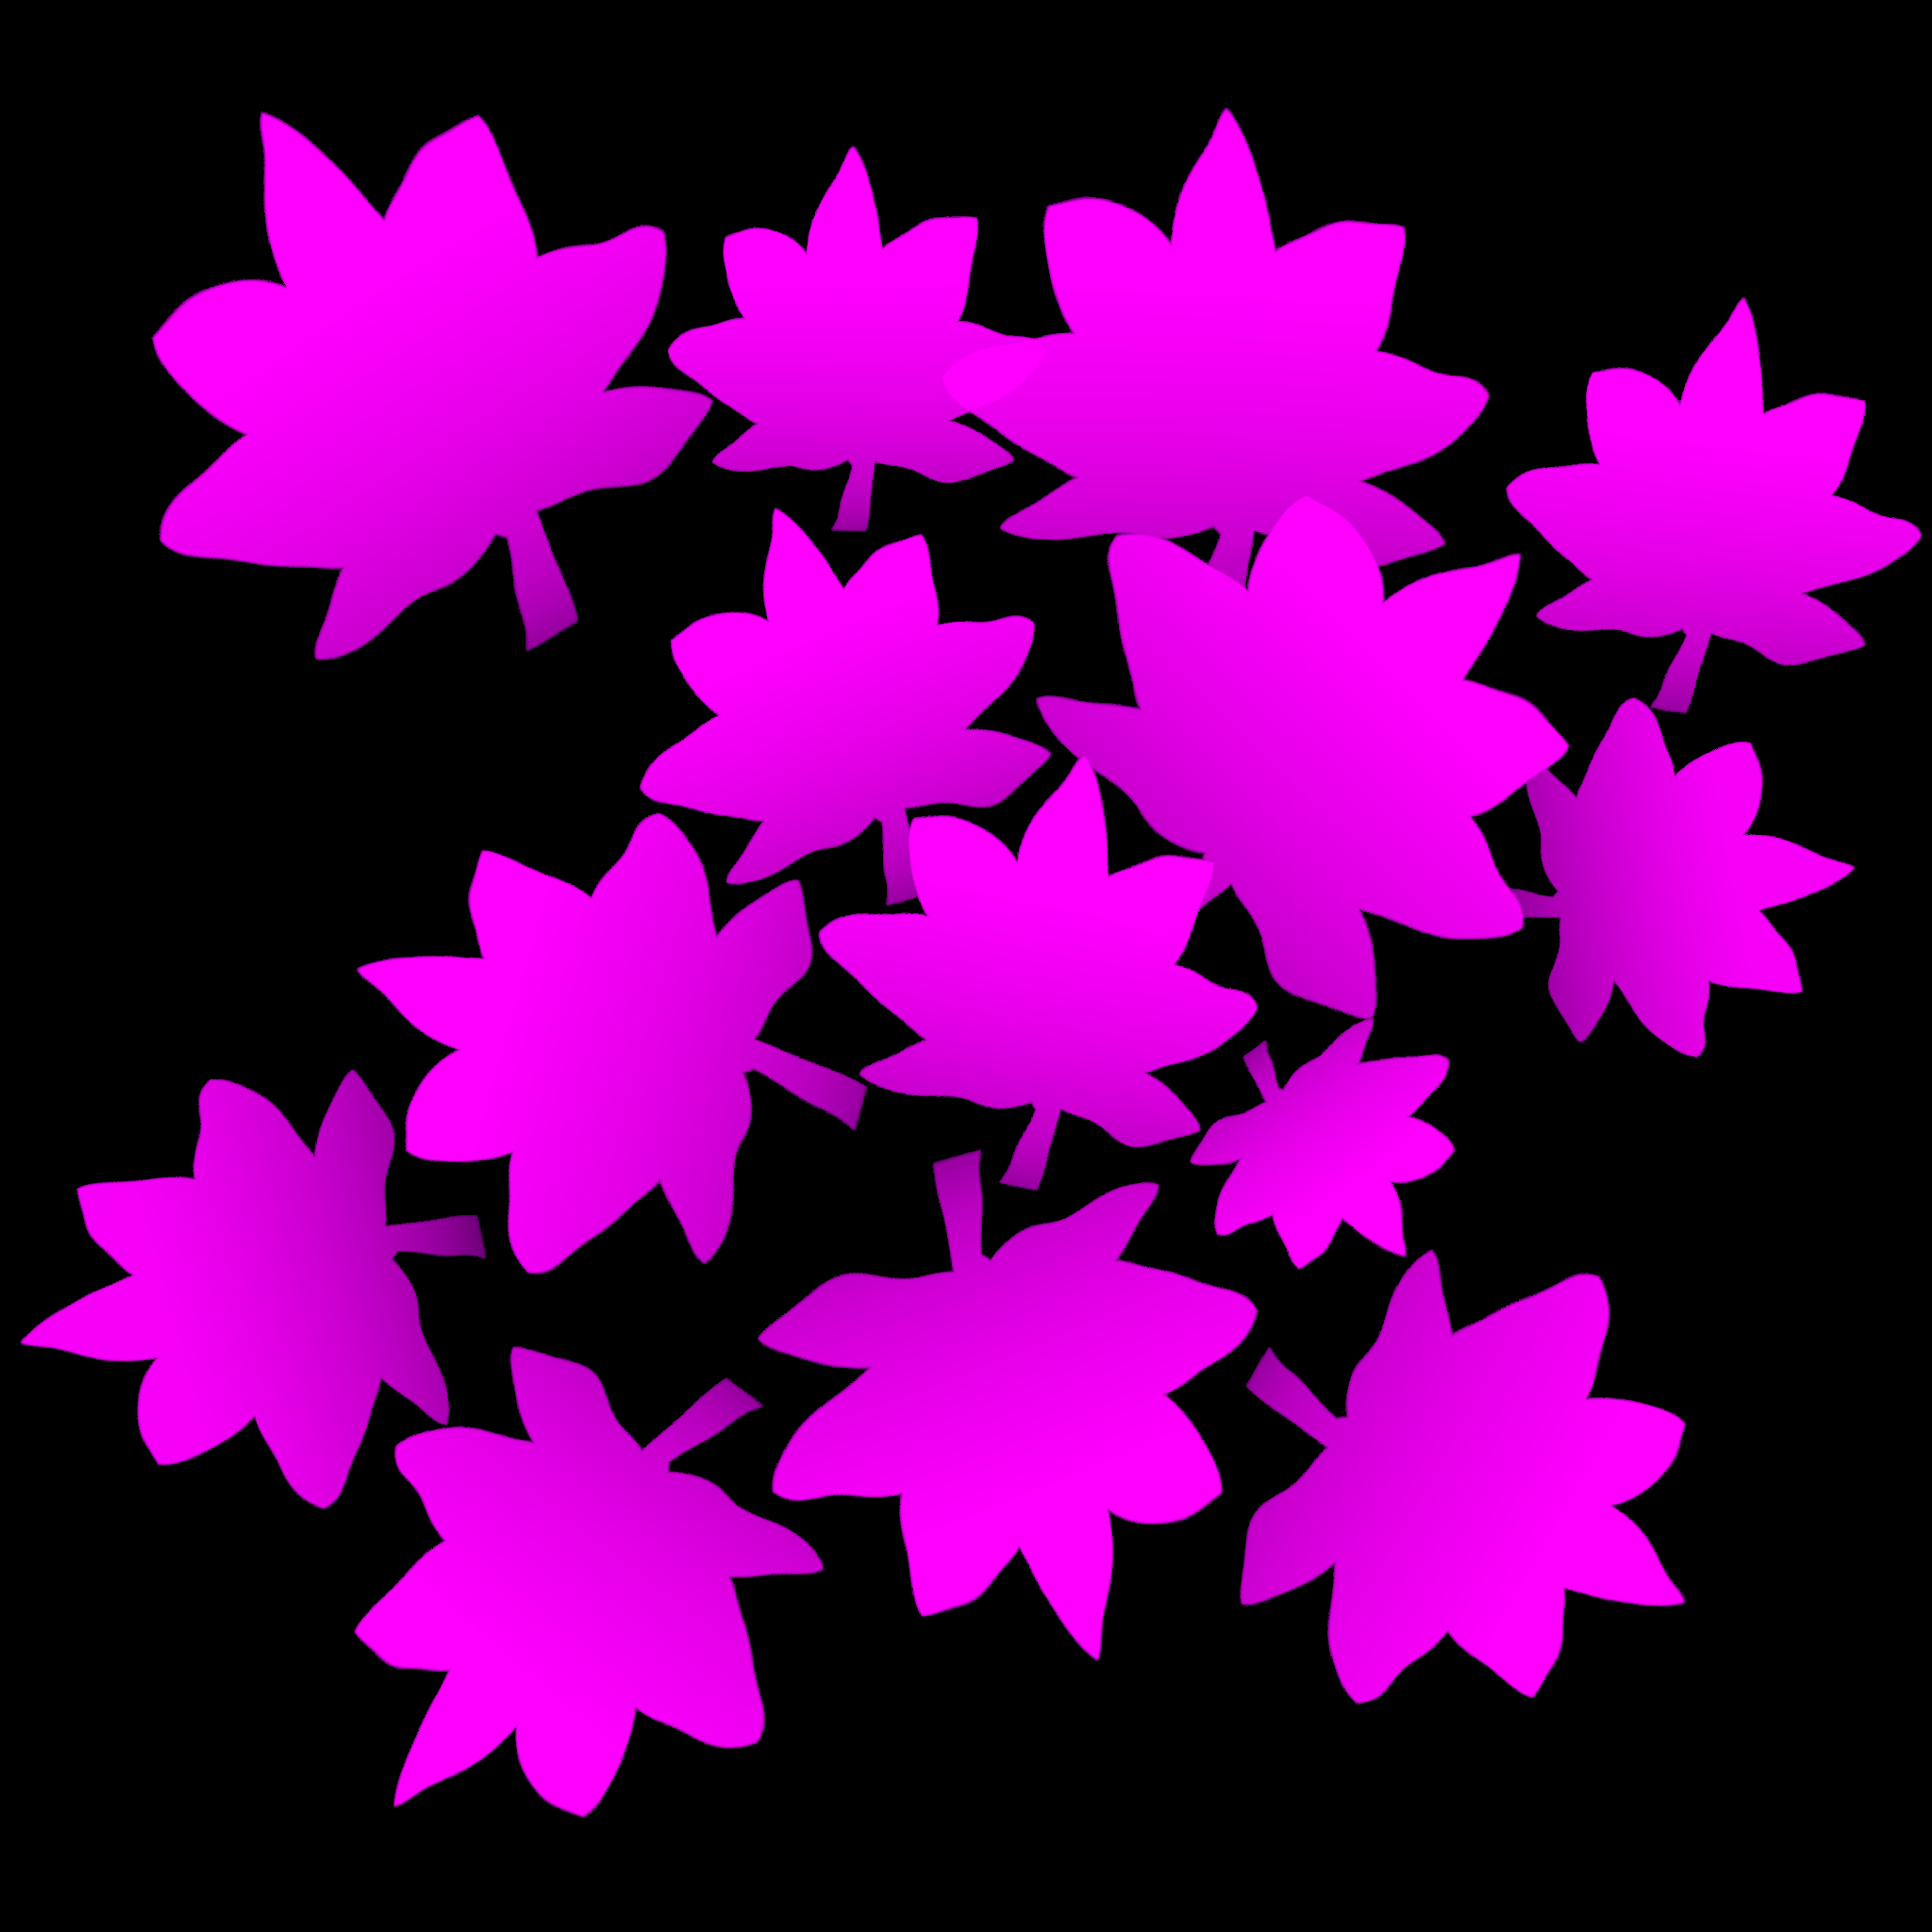
Finally, we create a leaf texture in Adobe Substance 3D Designer, generating a an opacity mask for color grading and the cutout.
Leaf Texture
Stylized Shading for Tree Canopy:
Base Color:
We applied a Y-axis gradient across the entire tree canopy and introduced a subtle tint to create a more cohesive and natural color flow.

Shading:
We used a simple Half-Lambert model to achieve a soft, stylized look,

Then we added Blinn-Phong highlights to provide specular detail.

Subsurface Scattering:
In the real world, light penetrates leaf surfaces and scatters within their structure before exiting, creating a translucent glow. To approximate this effect efficiently, we implemented a lightweight subsurface scattering model.

Without Subsurface Scattering

With Subsurface Scattering
First, we compute a scattering direction H (the half-vector) by combining the light vector L with the surface normal N, scaled by a user-defined bias parameter _LightScatteringBias:
H = normalize(L + N * _LightScatteringBias)
Increasing the _LightScatteringBias bends the scattering direction toward the surface normal, effectively controlling the amount of light wrapping.
Next, we evaluate the view-dependent transmission term by taking the dot product between the view vector V and the opposite of the scattering direction:
SSS = [max(0, V ⋅ (−H))]^_SssPower
The _SssPower controls the falloff of the glow lobe.
This produces a subtle back-lit effect that brightens regions where the viewer is looking toward the light through the tree canopy.
Master Shader, Wind, Rain, and Weather System:
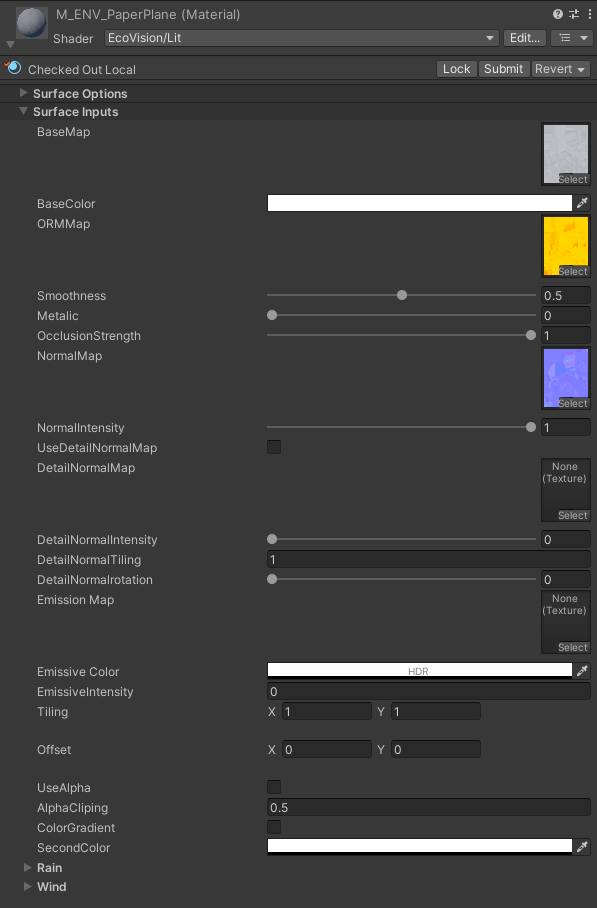
Master Shader:
In the early stages of production, we decided to create our own master shader for multiple purposes:
To use channel-packed textures and save bandwidth.
To make the shader easier to maintain and extendable in the future.
Wind:
We compacted the wind function used in the leaf shader into a subgraph. Then, we integrated it into our master shader. This ensures it behaves the same across the entire project.

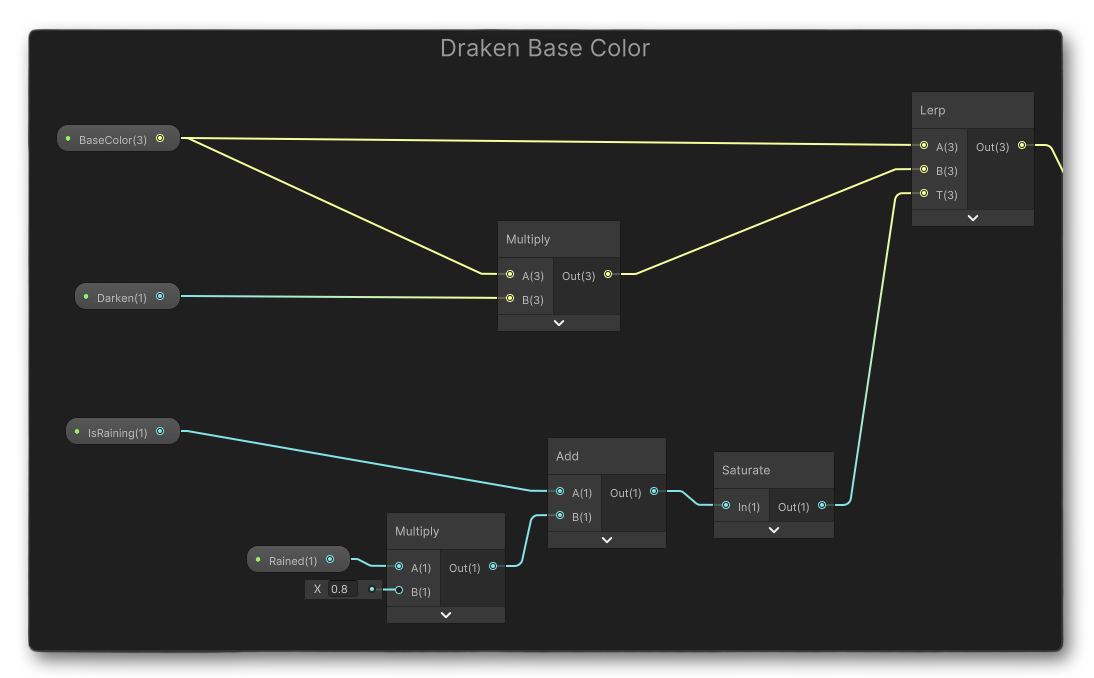
Rain:
When it rains, objects transition from dry to wet. If puddles form on the surface, ripples appear.
As an object becomes wetter, its surface appears smoother and darker, since more light is reflected and less is diffusely scattered. This effect is simple to simulate—adjust the surface smoothness based on wetness level and reduce diffuse accordingly.
For surfaces with accumulated water, waves and ripples will form. We achieve this by sampling two textures: one representing small-scale waves and another representing raindrop ripples.
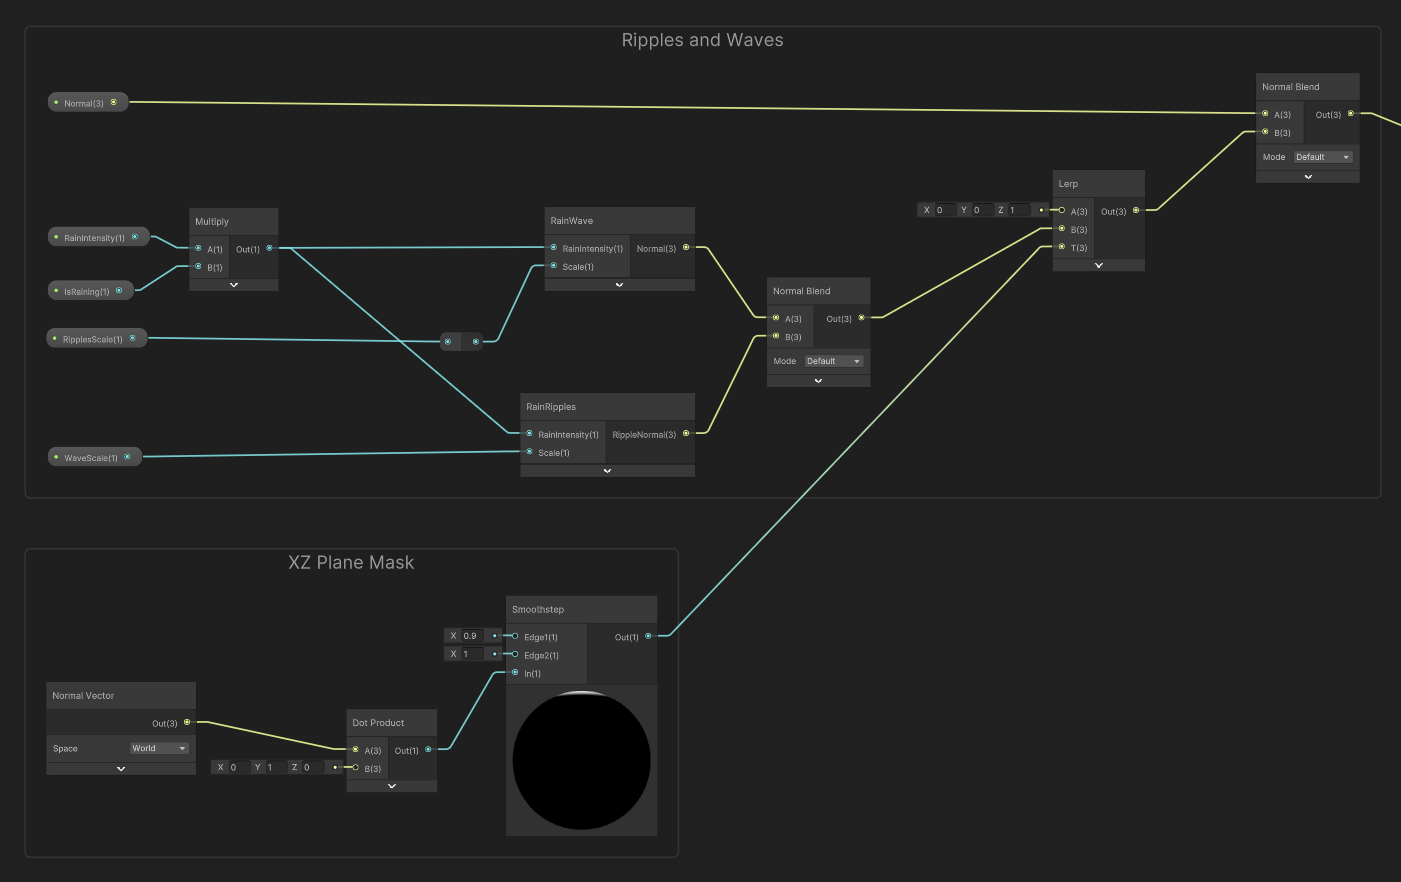
For waves, we simply sample the normal texture below twice with different frequency.
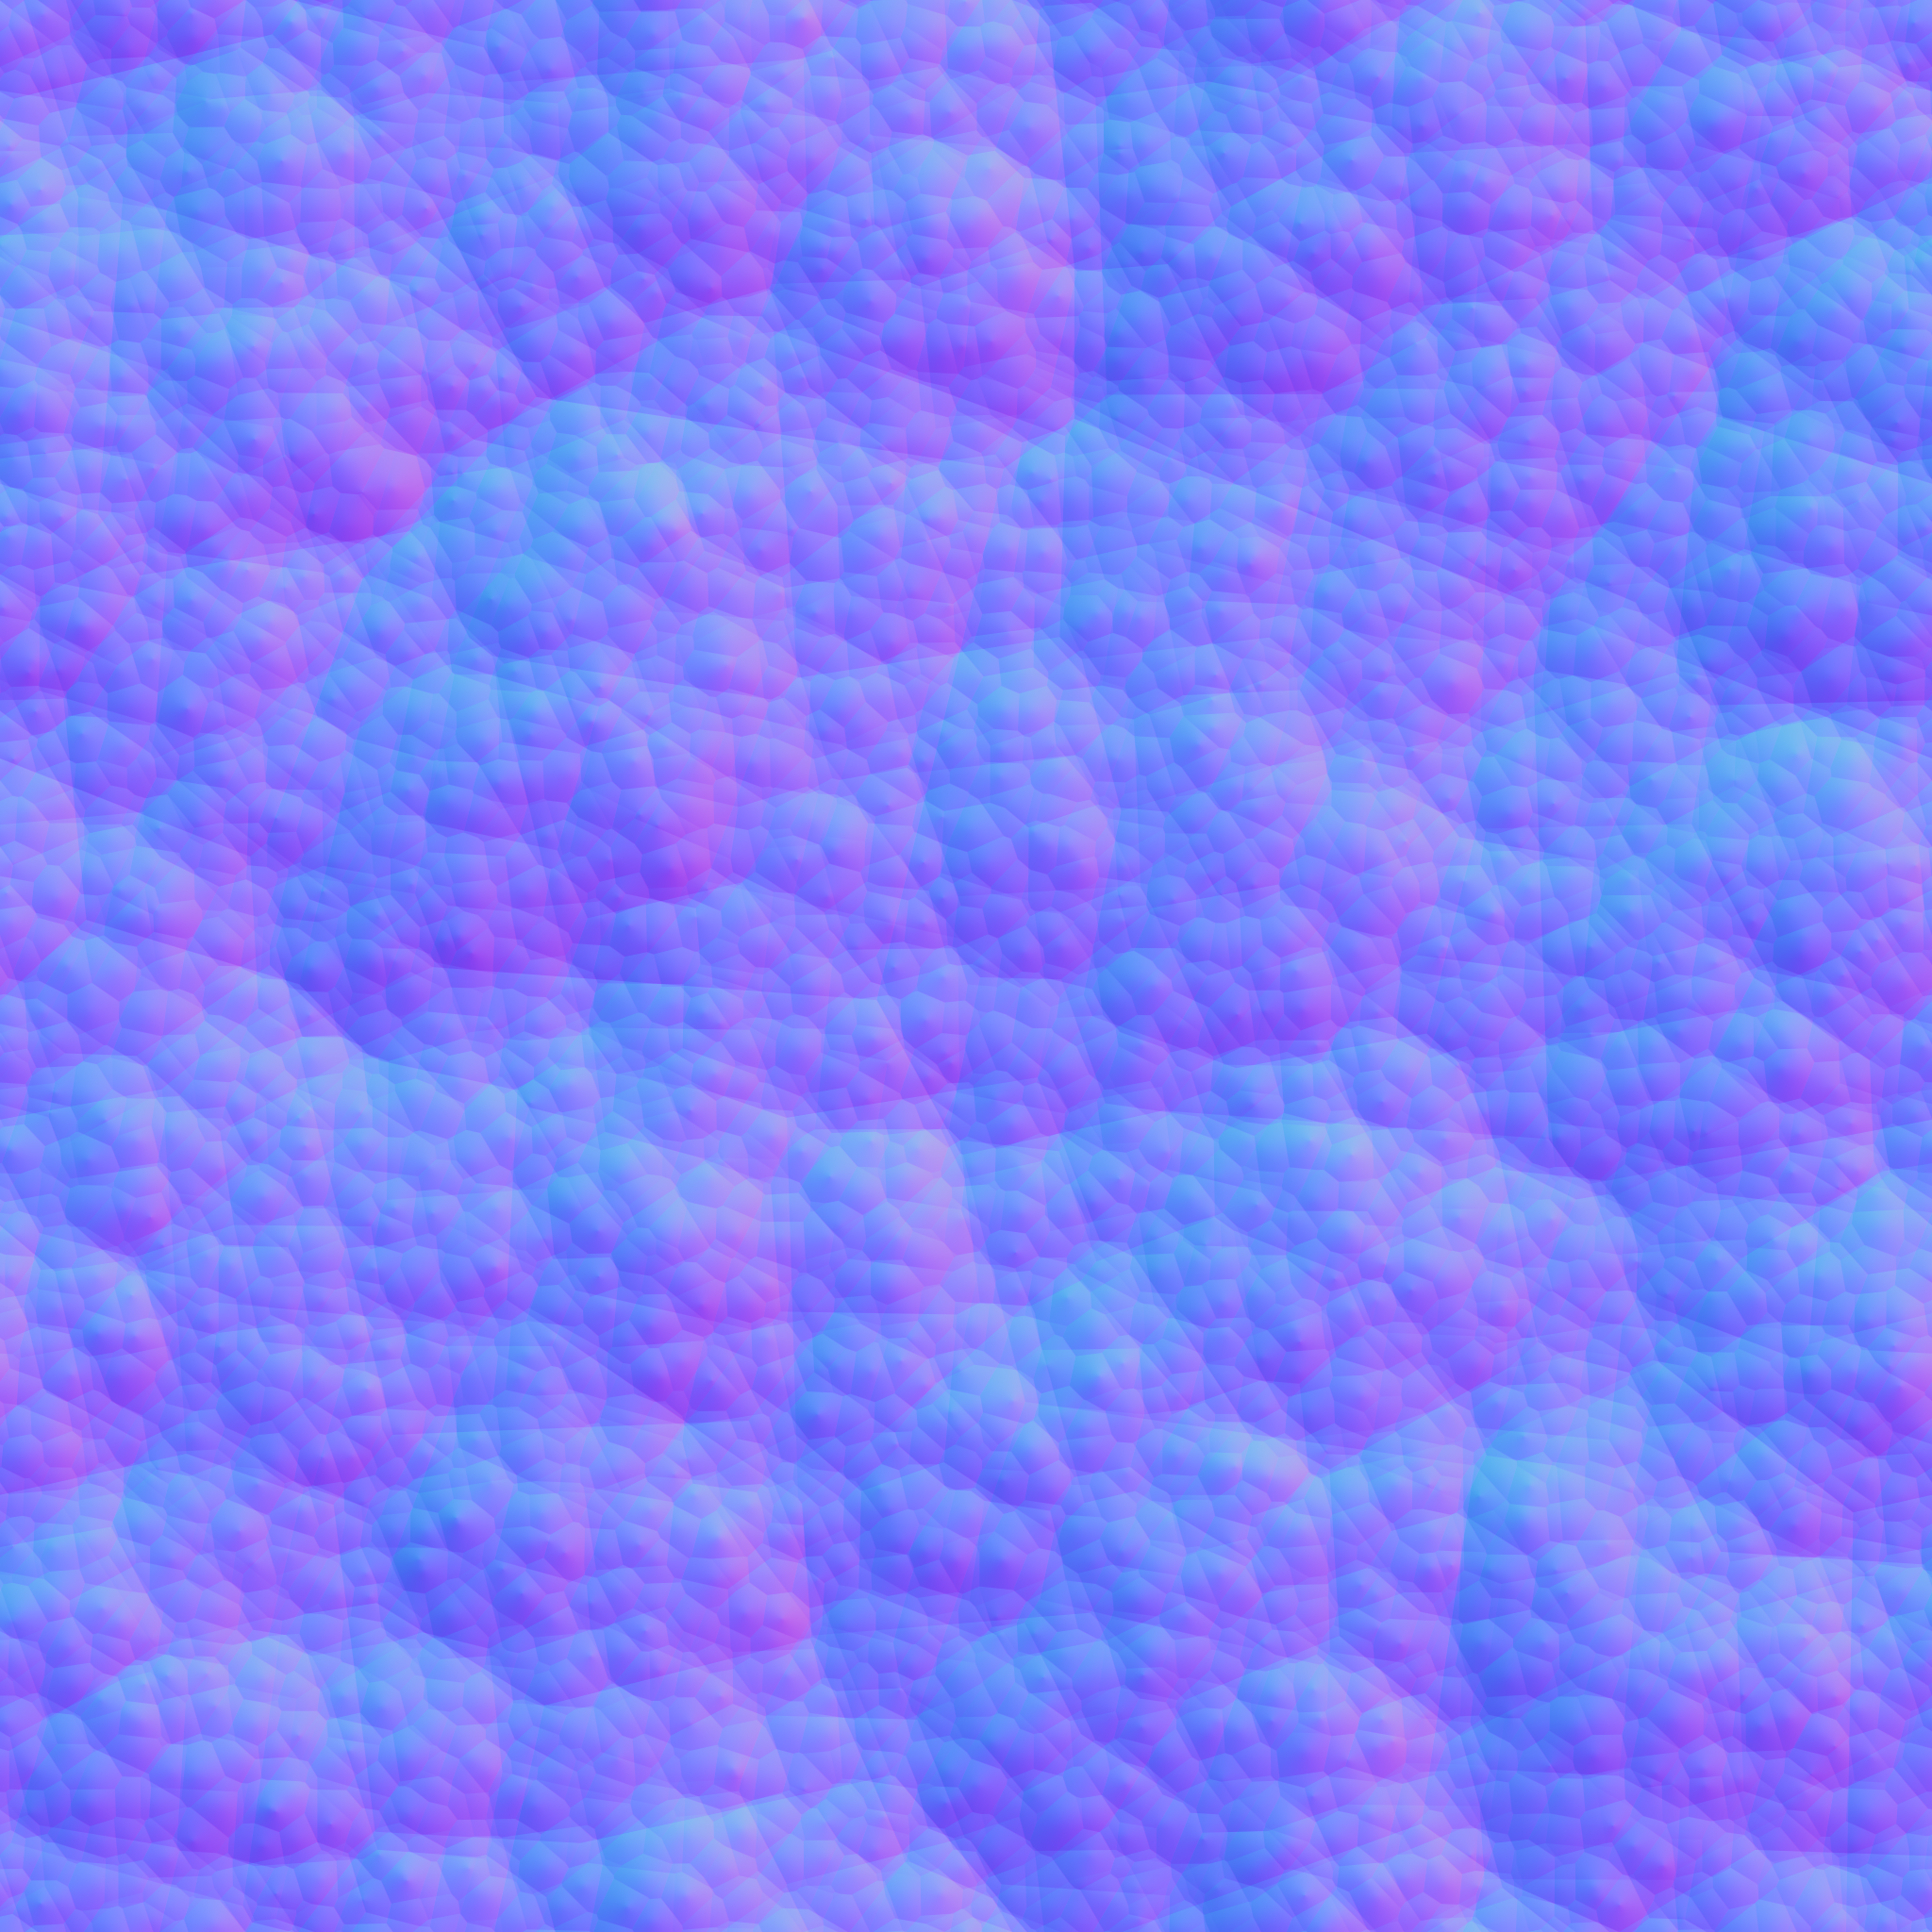
Normal Texture for Waves
For raindrop ripples, we generate animated ripple normals using an RGBA-packed texture generated from substance designer.
The R and G channels store the X and Y components of the ripple normal.
The B channel stores the ripple intensity, which decreases with distance from the center and fades out as it spreads.
The A channel stores a time offset to control the appearance of random ripple timing.
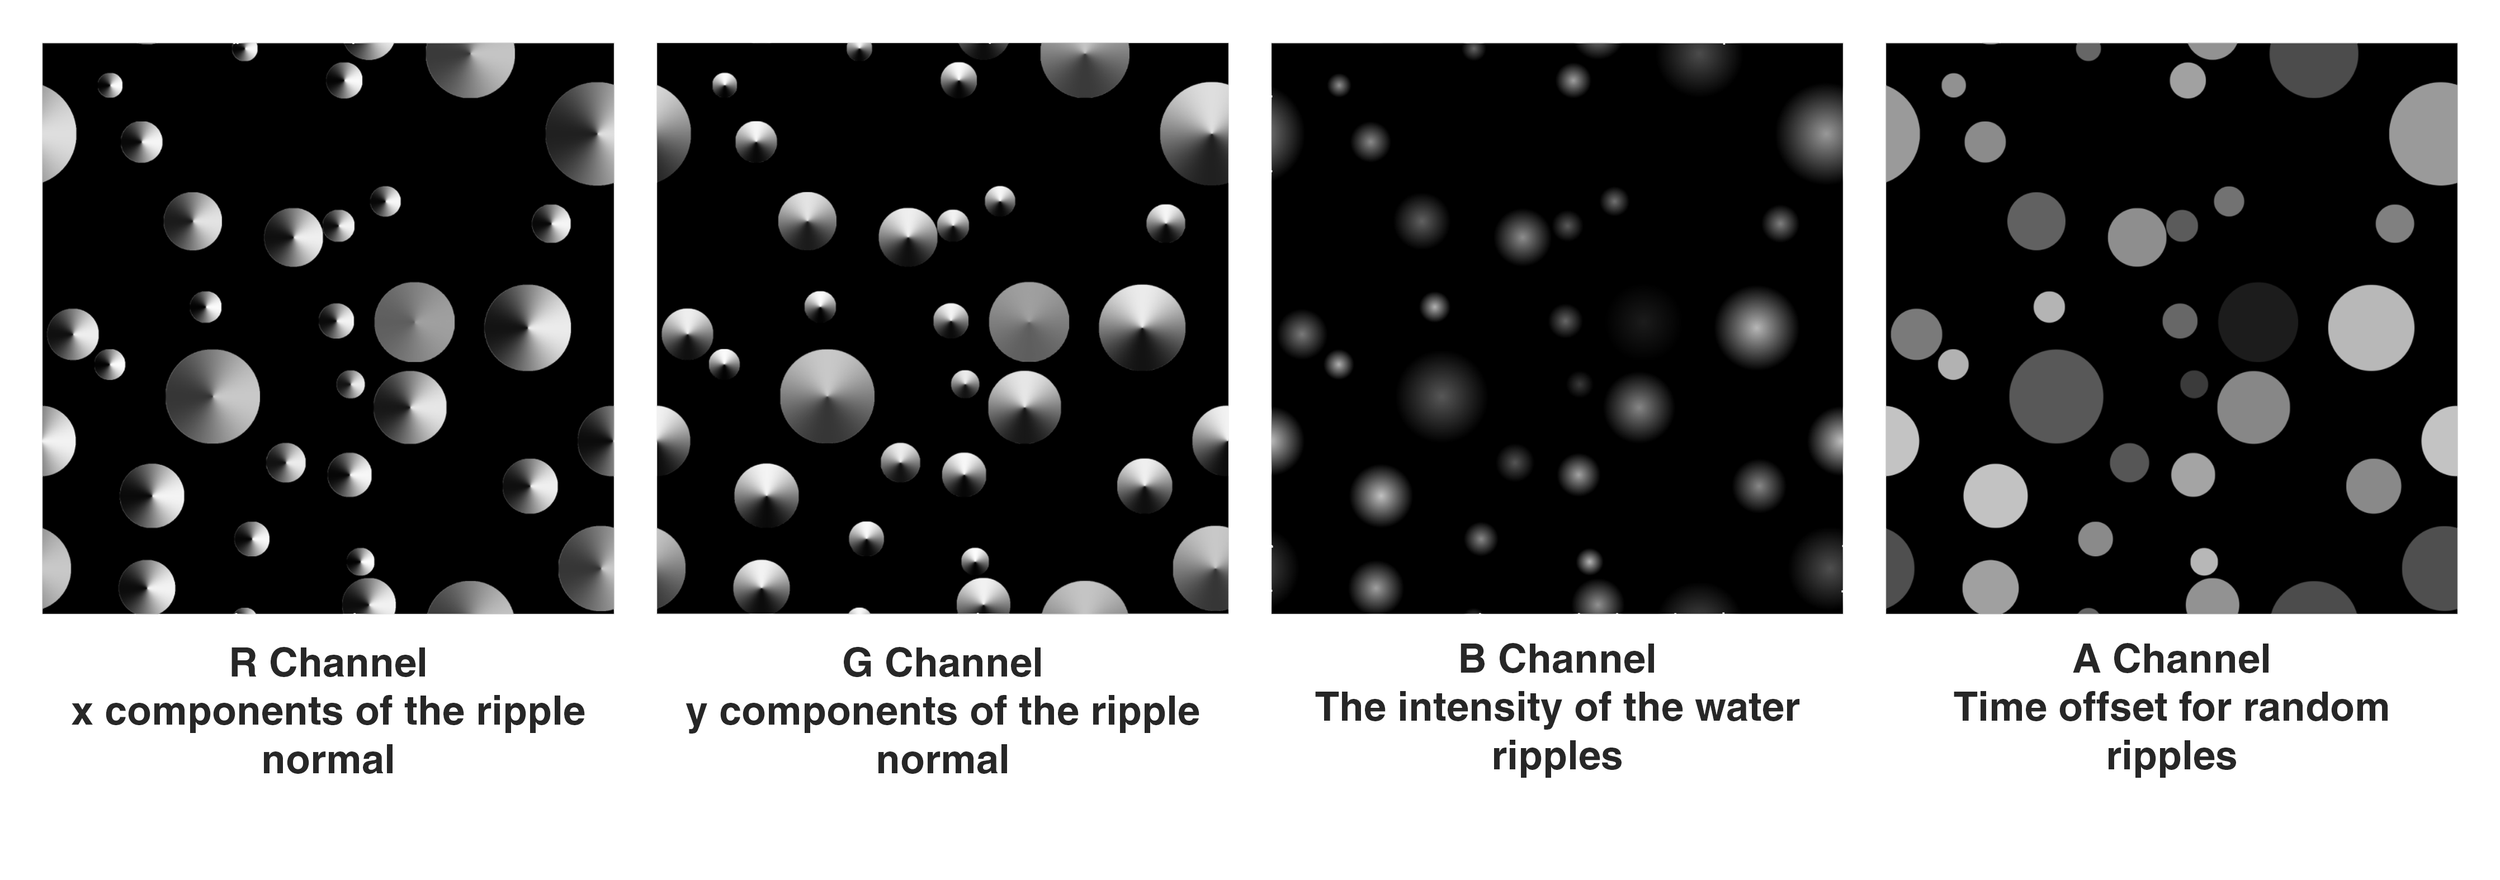
Using these channel values, the shader reconstructs the ripple normal and drives the timing of the ripple animation.

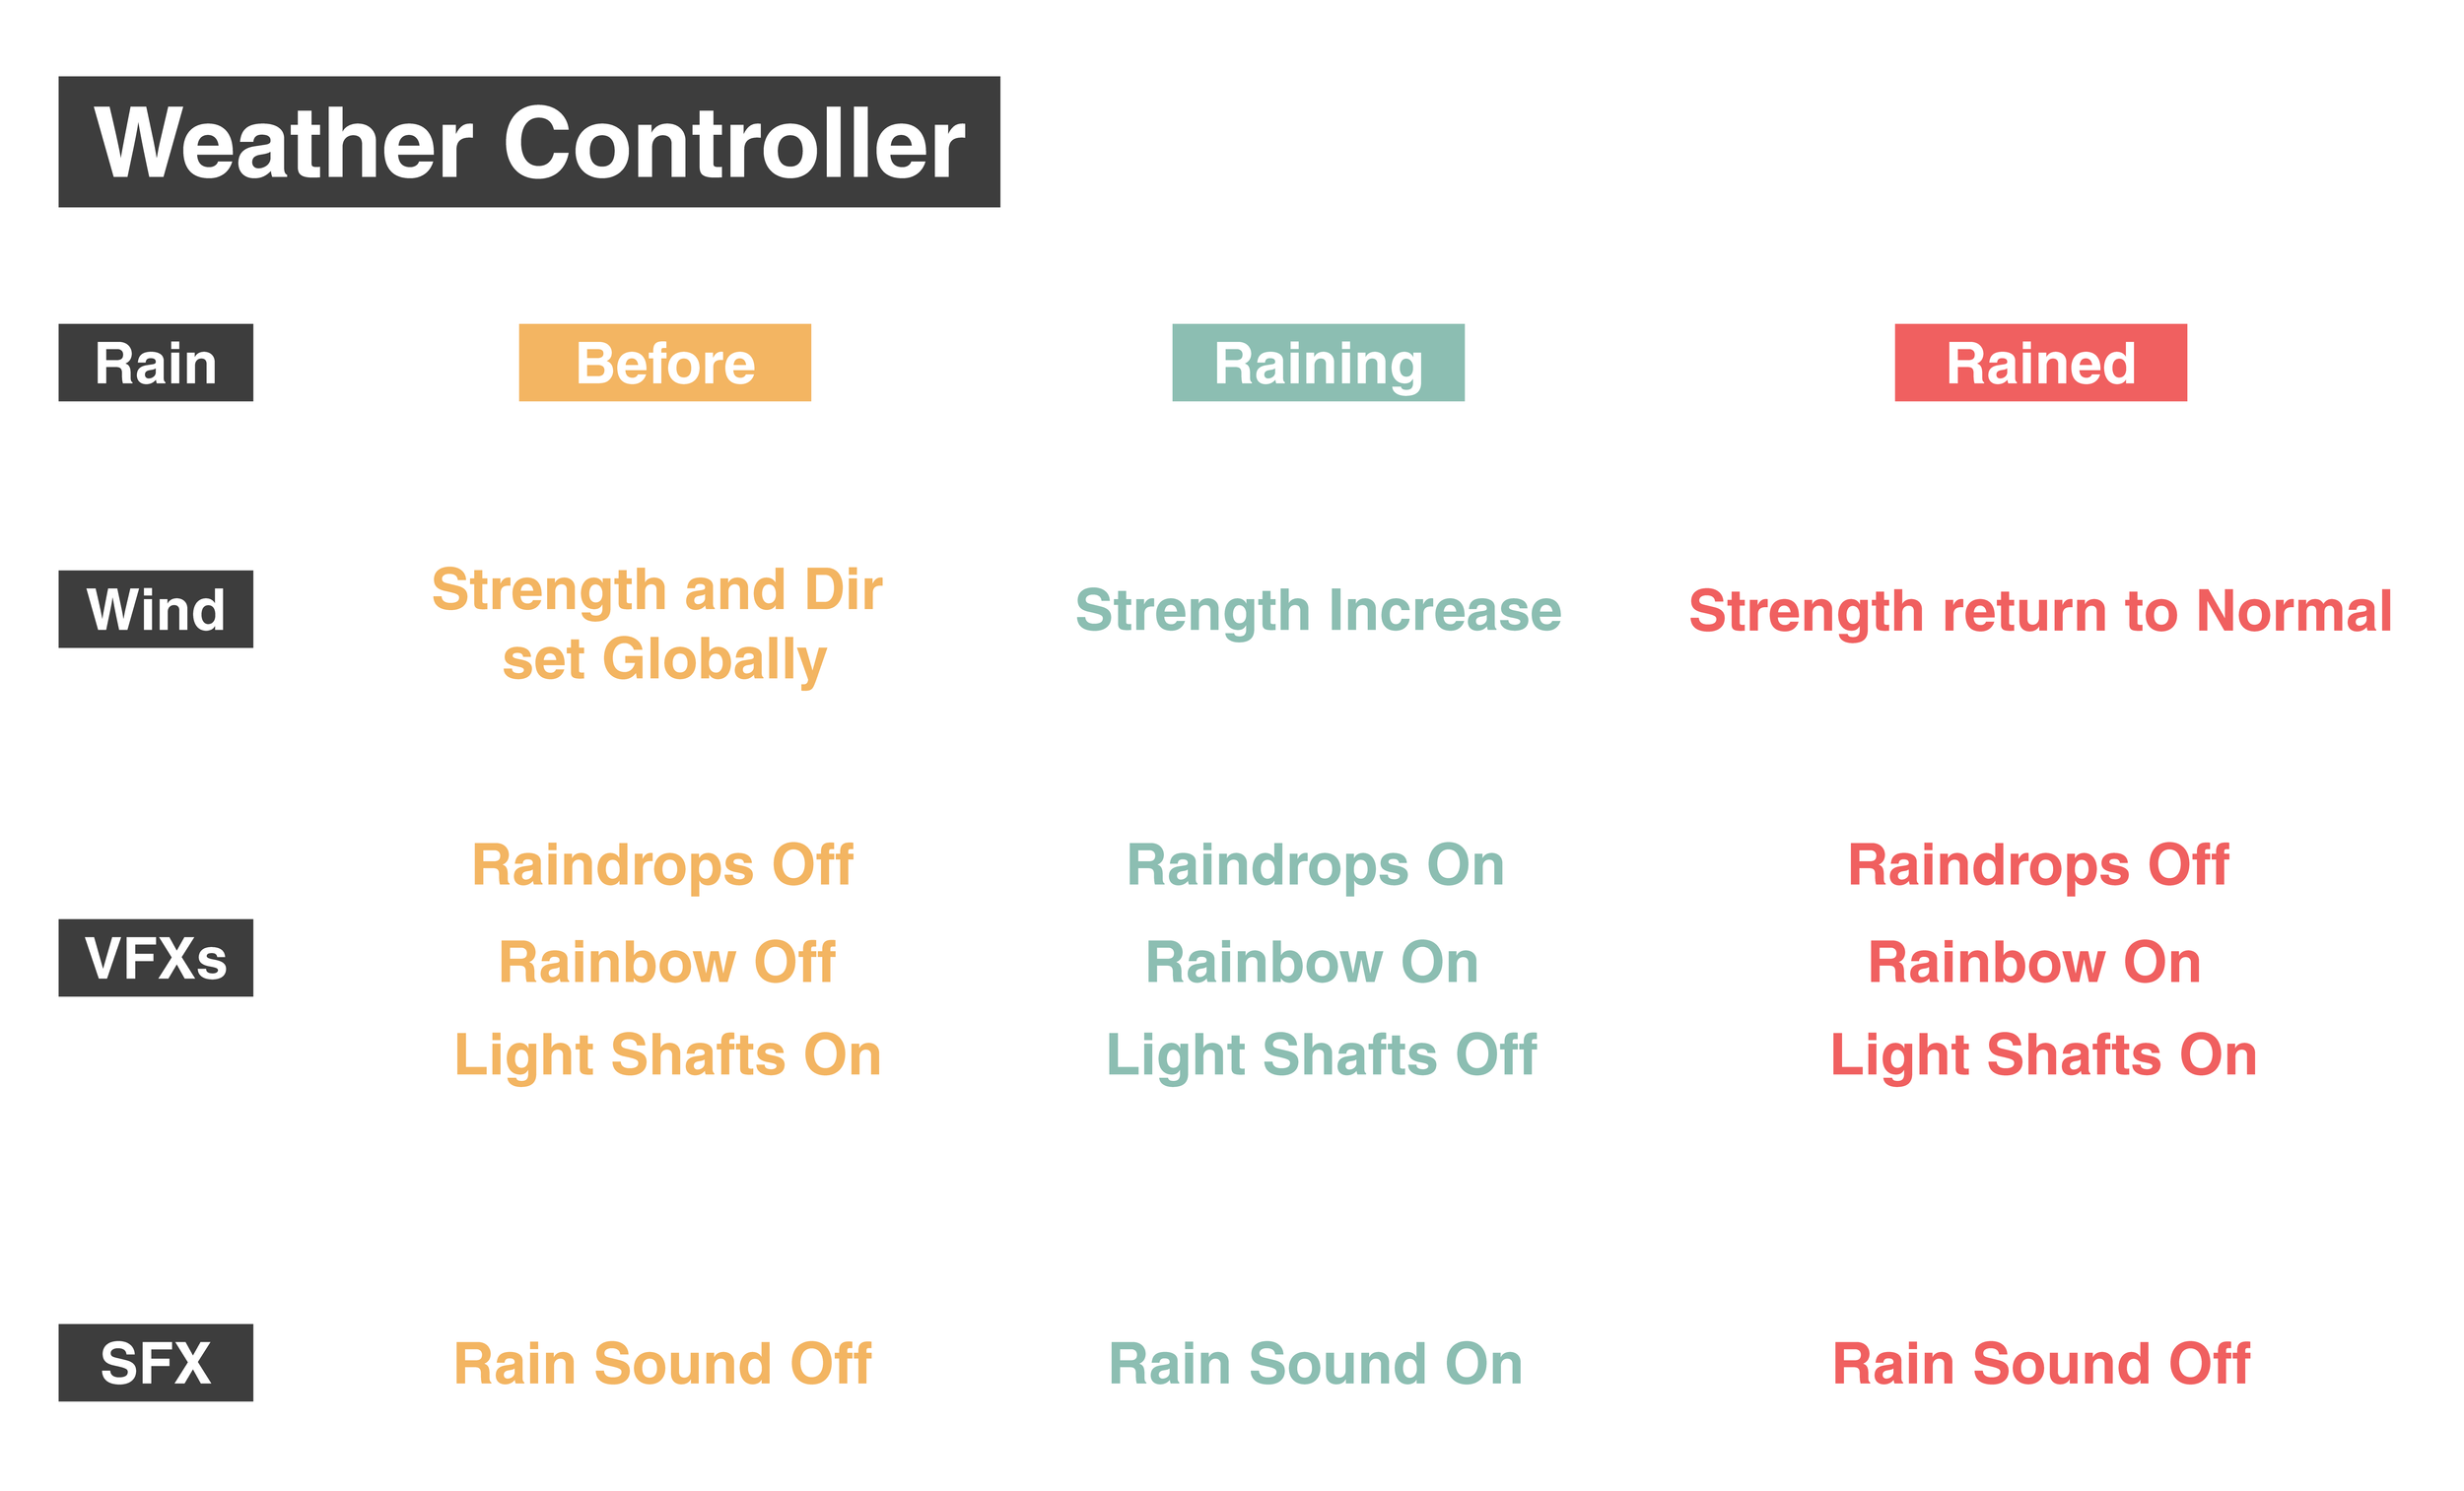
Weather System:
With the wind and rain shaders in place, we can now create a dynamic environment. Thanks to our master shader, it's easy to add these features to existing assets.
For our game, we have a rainy scene, so we developed a weather system to control the transition before, during, and after the rain.